Common Mistakes in Terminal Block Wiring
Terminal Block Wiring Mistakes | WILLELE
Common Mistakes in Terminal Block Wiring and How to Avoid Catastrophic Failures
It was 3:17 AM when my phone buzzed on the nightstand. On the other end of the line was the frantic voice of a plant manager. Their main production line, the lifeblood of the entire facility, was dead in the water. Millions of dollars in product were sitting idle, and every minute of downtime was costing them a fortune. After an hour of fruitless remote diagnostics, I was on my way to the plant, armed with a multimeter and a strong cup of coffee. When I arrived, the air was thick with tension and the smell of burnt plastic. It didn’t take long to find the source: a control cabinet panel, where a single, high-current terminal block was melted into a charred, unrecognizable lump. The cause? A single connection that had worked its way loose over time, creating a high-resistance point that eventually went supernova.
I can’t tell you how many times I’ve walked into a plant with a ‘ghost in the machine’ issue, only to trace it back to a fundamental mistake in terminal block wiring. These humble components are the backbone of any reliable electrical or automation system. They are the junctions where power and data are distributed, the critical points that tie everything together. When they work, nobody notices them. When they fail, entire operations grind to a halt. After more than 15 years as a Senior Application Engineer, I’ve seen it all, and most failures are not due to faulty equipment but to simple, preventable human error.
This article isn’t just a list of problems; it’s a field guide born from experience. We’re going to walk through the most common and costly mistakes, why they happen, and—most importantly—how you can avoid them to ensure your systems are safe, reliable, and robust.
The Unsung Heroes: Why Your Connections Are Mission-Critical
Before we dive into the mistakes, let’s give terminal blocks the respect they deserve. Think of them as the central nervous system of your electrical panel. They provide a secure and organized method to connect wires, making installation, maintenance, and troubleshooting far more manageable.
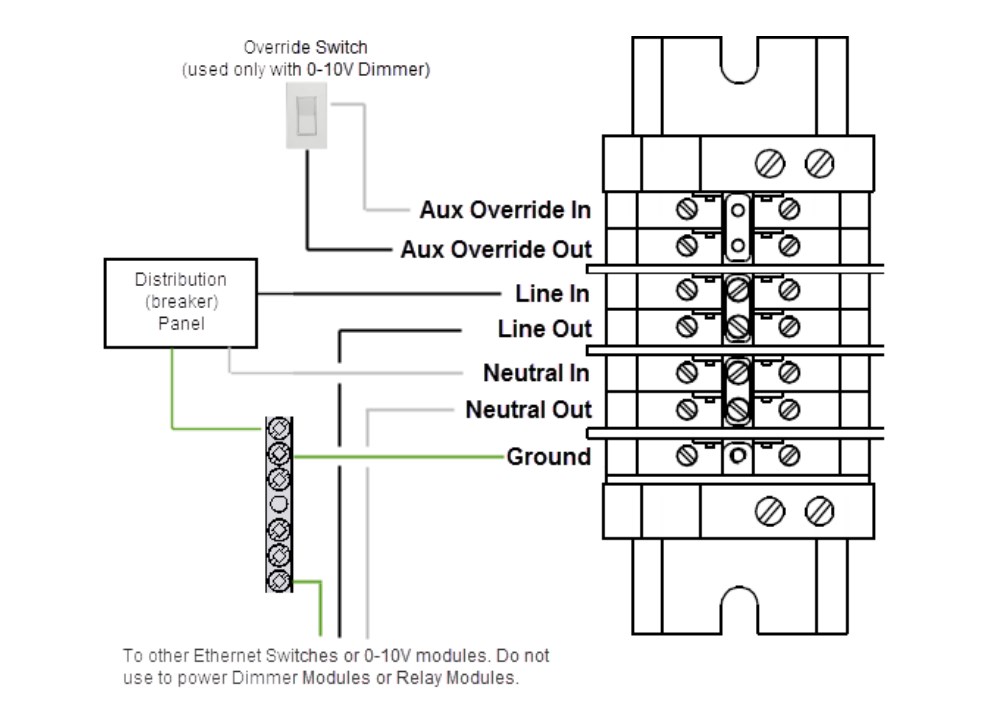
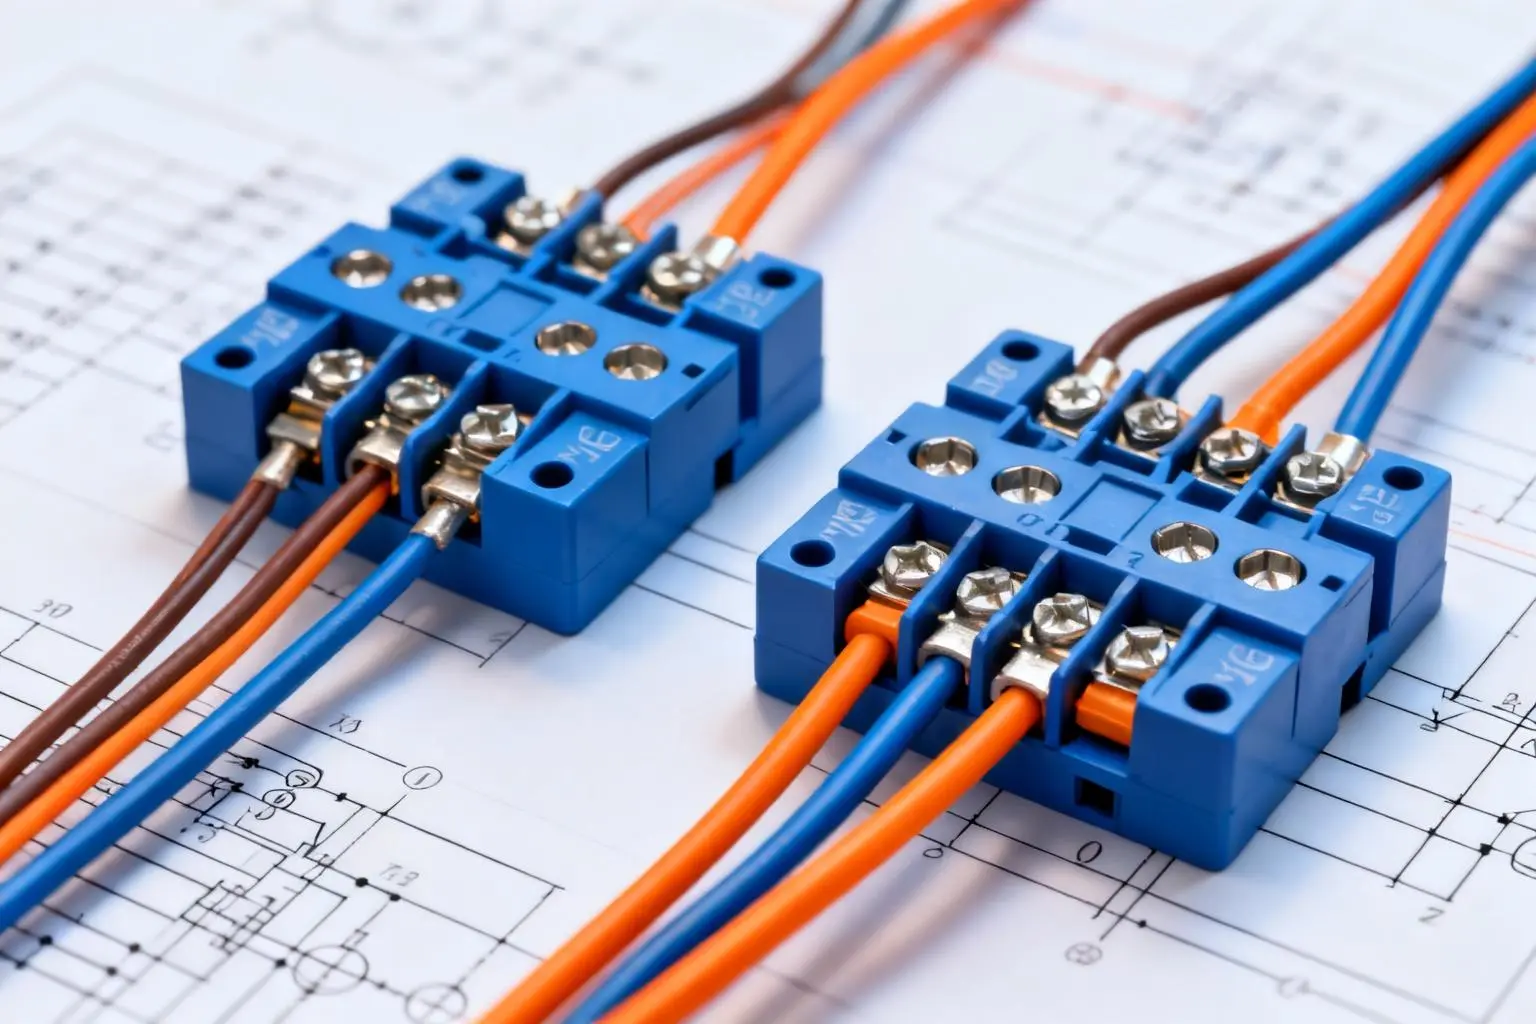
Figure 1: Typical terminal block wiring configuration showing proper wire routing and connection points
A proper connection ensures safety by preventing short circuits and electrical hazards like shock or fire. It guarantees reliability by maintaining a stable, uninterrupted flow of current, preventing voltage drops and equipment failure .
When you get your terminal block wiring right, you build a system that’s not only efficient and compliant with standards but also far easier to service down the road. When you get it wrong, you’re planting a time bomb in your control panel. Let’s defuse it.
The 9 Most Common Mistakes in Terminal Block Wiring (and How to Fix Them)
Mistake #1: The Torque Tightrope (Incorrect Torque)
This is, without a doubt, the number one cause of terminal block failure I encounter. It’s a delicate balance; technicians are often afraid of under-tightening, so they crank down on the screw with all their might. Both extremes are dangerous.
- The Problem: Applying too much or too little torque to a terminal screw.
- Why It Happens: This usually stems from a lack of proper tools (i.e., a calibrated torque screwdriver) and a “tighter is better” mentality. Without a torque specification, a technician is just guessing, and their guess can be wildly inaccurate.
- Consequences:
- Under-tightening creates a loose connection. This increases electrical resistance at the contact point, generating heat. Under load, this heat can build up until it melts the terminal block housing, creates a fire hazard, and causes intermittent or complete connection failure.
- Over-tightening is just as destructive. It can crush the wire strands, damage the conductive clamp, and even strip the screw threads or crack the terminal block housing itself . A crushed wire has a reduced cross-sectional area, leading to—you guessed it—overheating and potential failure.
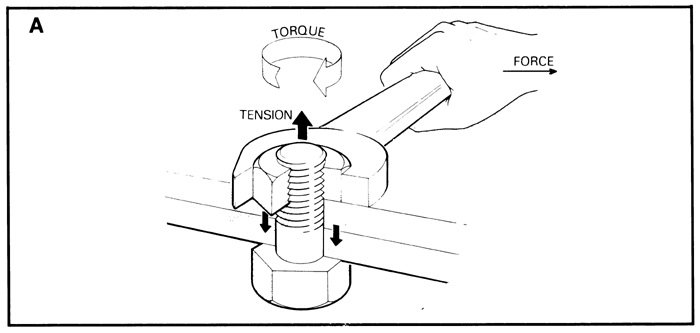
Figure 2: Terminal block torque specifications showing proper tightening values for different wire gauges
- The Solution:
- Use a Torque Screwdriver: This is non-negotiable for professional work. Every connection should be tightened to the manufacturer’s specified torque value.
- Consult the Spec Sheet: Manufacturers provide precise torque values for their products. This information is available on the product datasheet, often found on their website . For example, a Rockwell Automation terminal block datasheet will list the exact recommended tightening torque in Newton-meters (N·m) or pound-inches (lb·in) .
Pro-Tip: Make torquing a standard part of your quality control checklist for every panel build. A few extra seconds per connection can save you days of troubleshooting later.
Mistake #2: The Goldilocks Gaffe (Improper Wire Stripping)
Just like torque, wire stripping requires precision. The exposed length of the conductor must be “just right.”
- The Problem: Stripping too much or too little insulation from the wire end.
- Why It Happens: Rushing the job, using dull or improper stripping tools, or failing to check the terminal’s specifications.
- Consequences:
- Too Little: If the insulation is not stripped back far enough, it can get caught under the clamping mechanism. You might think you have a secure connection, but the screw is actually tightening on the insulation, not the conductor. This results in a very poor or non-existent electrical connection.
- Too Much: Stripping too much insulation leaves an exposed section of the conductor outside the terminal block. This creates a serious shock hazard and increases the risk of a short circuit if the exposed wire touches an adjacent conductor or metal component .
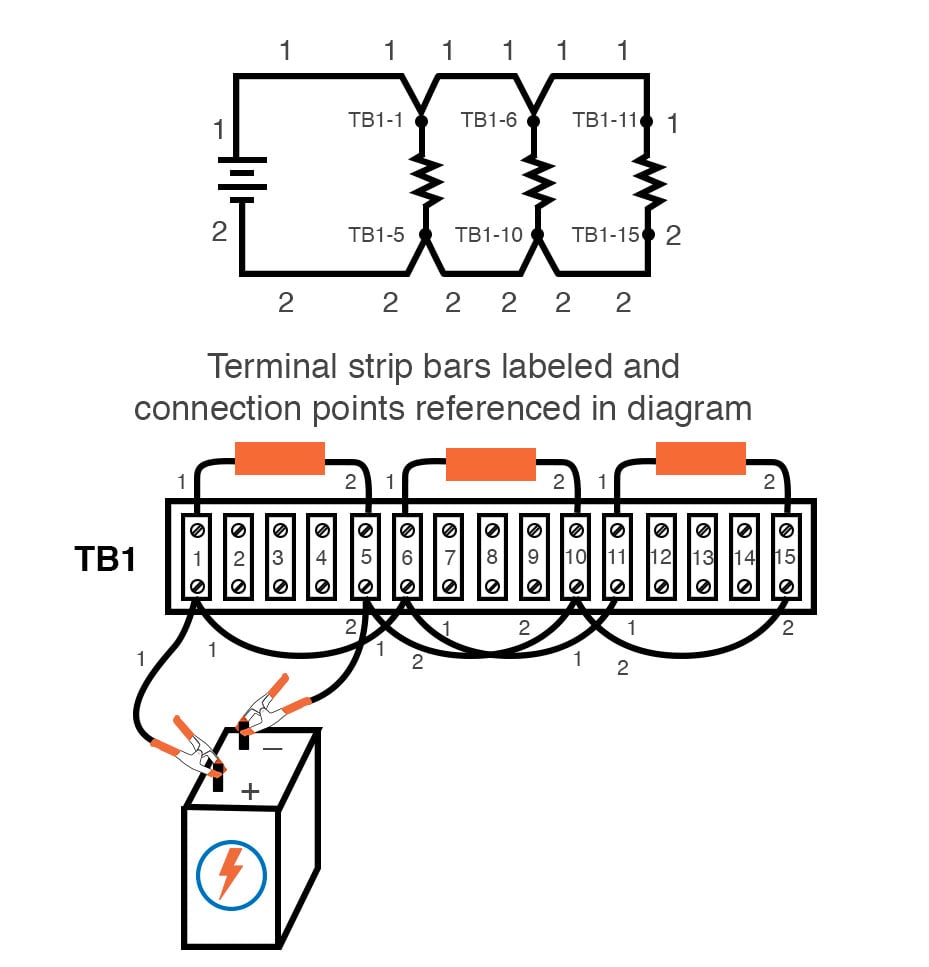
Figure 3: Proper wire stripping length specification for terminal block connections
- The Solution: Check the manufacturer’s datasheet for the correct strip length. The Rockwell Automation technical data sheet, for instance, clearly specifies the required wire strip length for each terminal block model . Use a quality wire stripper with properly sized notches to ensure a clean, precise cut every time.
Mistake #3: The Square Peg, Round Hole (Wrong Wire Size)
Every terminal block is designed to accept a specific range of wire sizes (AWG or mm²). Ignoring this is a recipe for a bad connection.
- The Problem: Using a wire that is too large or too small for the terminal block’s rated capacity.
- Why It Happens: Making assumptions, substituting materials without checking specifications, or simply grabbing the wrong wire spool.
- Consequences:
- Wire Too Small: The clamping mechanism may not be able to apply enough pressure to hold the wire securely. The connection can easily pull out and will likely have high resistance, leading to overheating.
- Wire Too Large: You might not be able to insert the wire fully into the terminal, or you may be tempted to trim strands to make it fit (a huge mistake!). This compromises the wire’s current-carrying capacity and creates an unreliable connection point that is doomed to fail.
- The Solution: Always verify that your wire gauge is within the acceptable range specified on the terminal block’s datasheet. If you need to transition between wire sizes, use a terminal block specifically designed for that purpose.
Mistake #4: The Stranded Wire Scramble (Neglecting Ferrules)
This is a mistake that separates the amateurs from the professionals, especially in Europe where it’s often mandated by regulation. When connecting stranded wire to a screw terminal, using a ferrule is not optional—it’s essential best practice.
- The Problem: Inserting bare stranded wire directly into a screw-clamp or spring-clamp terminal block.
- Why It Happens: Lack of awareness, cost-cutting, or it’s simply not common practice in regions without regulations like the CE mark requirements.
- Consequences: When you tighten a screw onto bare stranded wire, the individual strands splay out and get compressed unevenly. A few stray strands can break off or fail to make good contact, reducing the effective cross-section of the wire and increasing resistance. As one article aptly puts it, melted terminal blocks on devices like 3D printers are a common complaint for this very reason . Over time, vibration and thermal cycling can cause more strands to loosen, leading to a cascading failure.
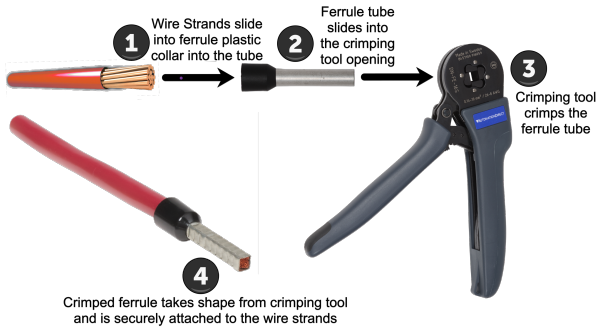
Figure 4: Comparison of bare stranded wire vs. properly ferruled wire connection showing improved contact and reliability
- The Solution: Use a wire ferrule. A ferrule is a small, tin-plated copper tube that is crimped onto the end of a stranded wire, effectively turning it into a solid, unified pin. It contains all the strands, ensuring every single one contributes to the electrical connection. This creates a superior, gas-tight connection with low resistance and high mechanical stability.
Pro-Tip: Think of a ferrule as being like the aglet on a shoelace. It gathers all the loose ends into a single, easy-to-manage tip that won’t unravel or fray when you put it where it needs to go. A proper ferrule crimper and a kit of assorted ferrules are inexpensive investments that will dramatically improve the quality of your terminal block wiring.
Mistake #5: The Weather Worry (Ignoring Environmental Factors)
A control panel in an air-conditioned office has a very different life than one on a factory floor next to a wash-down station. You must design for the environment.
- The Problem: Failing to account for temperature, humidity, corrosion, and vibration.
- Why It Happens: Designing in a vacuum without considering the real-world application environment.
- Consequences:
- Moisture and Humidity: Can lead to corrosion of the metal components and degradation of the plastic housing, severely shortening the service life of the terminal 7.
- Corrosion: Salty or chemical-laden air will aggressively attack metal clamps and screws, leading to high-resistance connections and eventual failure.
- Vibration: Constant vibration (e.g., from a nearby motor) can cause screw connections to gradually loosen over time.
- The Solution: Choose the right terminal block for the job. For corrosive environments, select terminals with special plating or use insulation displacement or spring-clamp types that are less susceptible to loosening. In high-vibration areas, spring-clamp terminals are often superior to screw-clamps. For wet areas, ensure your enclosure is properly rated (e.g., NEMA 4X) and consider using protective coatings or insulating sleeves on connections where appropriate .
Mistake #6: The Dirty Work (Poor Wire Preparation)
The quality of a connection is only as good as the surfaces being joined.
- The Problem: Using wires with contaminated or oxidized ends.
- Why It Happens: Wires can pick up oil, dirt, or dust on a job site. Copper wire also naturally oxidizes when exposed to air, forming a less conductive layer on its surface.
- Consequences: Contaminants and oxidation act as an insulating layer, preventing a clean, low-resistance metal-to-metal contact. This inevitably leads to heat buildup and potential failure.
- The Solution: Ensure wire ends are clean before termination. If a wire has been sitting for a long time and looks dull, give it a quick clean with a wire brush or emery cloth to expose the bright, shiny copper underneath. Always store wire in a clean, dry environment.
Mistake #7: The “Set and Forget” Syndrome (Skipping Maintenance)
Even the best-wired panel needs a check-up now and then.
- The Problem: Assuming a connection, once made, will remain perfect forever.
- Why It Happens: Maintenance schedules are often overlooked in favor of more immediate production demands. “If it ain’t broke, don’t fix it” becomes the default mantra.
- Consequences: Thermal cycling (the expansion and contraction from heating up during use and cooling down when idle) and ambient vibration can cause screw terminals to loosen over time. This is a slow, insidious process that eventually leads to the kind of catastrophic failure I described in my opening story.
- The Solution: Implement a periodic inspection schedule. For critical systems, this should include thermographic (infrared) scans of control panels to identify “hot spots” at terminals, which are a clear indicator of a loose connection. Additionally, schedule periodic re-torquing of all critical screw terminals, especially in the first year of operation.
Mistake #8: The Material Mismatch (Mixing Incompatible Materials)
Not all metals play well together. Connecting dissimilar metals, like aluminum and copper, without the proper interface can cause big problems.
- The Problem: Directly connecting two different types of metal conductors, most commonly aluminum and copper.
- Why It Happens: This is common in older facilities where aluminum wiring might be present. A technician might try to connect new copper-wired equipment directly to an old aluminum feed.
- Consequences: This creates a galvanic cell. In the presence of moisture, the two metals will begin to corrode at an accelerated rate. This galvanic corrosion creates a highly resistive, unstable connection that will fail.
- The Solution: Never connect aluminum and copper wire directly. Use terminal blocks that are specifically rated for both (marked “AL/CU”) or use a specialized transition connector. These connectors use a tin-plated aluminum body and an oxide-inhibiting compound to create a safe and stable bridge between the two metals.
Mistake #9: The Cryptic Code (Inadequate Documentation)
A panel with a rat’s nest of unlabeled wires is a nightmare for the next person who has to work on it—and that person might be you in six months.
- The Problem: Failing to label wires and create accurate wiring diagrams.
- Why It Happens: Rushing to get a system online, viewing documentation as a “nice-to-have” rather than a necessity.
- Consequences: Troubleshooting becomes nearly impossible. What should be a five-minute fix turns into a multi-hour ordeal of tracing wires by hand. It increases downtime, raises costs, and introduces a high risk of making things worse by disconnecting the wrong wire.
- The Solution: Discipline. Every single wire entering or leaving a terminal block should have a clear, durable label that corresponds to an up-to-date wiring diagram. This is a hallmark of professional terminal block wiring. It’s not just about getting the system to work today; it’s about ensuring it can be safely and efficiently serviced for its entire lifecycle.
The 3-Step Prevention Framework
Avoiding these mistakes isn’t about memorizing a list; it’s about adopting a professional methodology. I call it the “Plan, Process, Proof” framework.
- Plan: Before you strip a single wire, do your homework. Select the correct terminal blocks, wires, and ferrules for the application’s voltage, current, and environment. Read the datasheets. Know your torque values and strip lengths. A good plan is your first line of defense.
- Process: This is where craftsmanship comes in. Use high-quality tools: calibrated torque screwdrivers, sharp wire strippers, and proper ferrule crimpers. Work methodically. Keep your workspace and materials clean. Label everything as you go.
- Proof: Trust, but verify. After making a connection, give the wire a gentle tug to ensure it’s mechanically secure. For critical systems, perform a point-to-point continuity check. Once the panel is complete, have a second person review the work. Finally, perform thermographic scans as part of your regular maintenance to prove the long-term integrity of your connections.
Your Questions Answered: Terminal Block Wiring FAQ
1. Why do my terminal blocks keep melting?
This is almost always due to a high-resistance connection generating excess heat. The most common causes are an under-torqued screw, neglected ferrules on stranded wire, or using a wire gauge that is too small for the current load.
2. Are spring-clamp terminals better than screw terminals?
It depends on the application. Spring-clamp terminals offer excellent vibration resistance and a consistent clamping force that isn’t dependent on technician skill. They are faster for high-volume production. However, traditional screw-clamps often accommodate a wider range of wire sizes and can sometimes offer higher clamping force for very large conductors.
3. Can I put two wires into one terminal?
Only if the terminal block is explicitly designed and rated for it. Most standard terminals are not. Forcing two wires into a single-wire clamp is a major safety violation that results in an unreliable connection for both wires. Use a multi-conductor terminal block instead.
4. Where do I find the correct torque value?
Always on the manufacturer’s specification sheet or datasheet. If you cannot find it, do not guess. Contact the manufacturer’s technical support. Reputable brands like SHINING E&E INDUSTRIAL make this information readily available .
5. Do I really need to use ferrules on every stranded wire?
For connections into screw or spring terminals, yes. It is the single best thing you can do to improve the reliability and safety of your terminal block wiring. For connections that will be soldered or use a dedicated crimp lug, they are not necessary.
6. What’s the best way to check for loose connections in a live panel?
A thermographic (infrared) camera is the safest and most effective tool. Loose connections will show up as “hot spots” long before they fail catastrophically.
7. How often should I re-torque terminal screws?
A good rule of thumb is to perform a check after the first 3-6 months of operation (to account for initial settling), and then every 1-2 years thereafter as part of a preventive maintenance schedule, especially in high-vibration or high-load environments.
8. Is it okay to tin the ends of stranded wire with solder instead of using a ferrule?
No, this is a dangerous and outdated practice. Solder is soft and will “creep” or deform under the pressure of a screw clamp, leading to a loose connection over time. Ferrules are designed for this application; solder is not.
9. My wire is too big for the terminal. Can I just cut a few strands to make it fit?
Absolutely not. Removing strands reduces the current-carrying capacity (ampacity) of the wire, creating a dangerous bottleneck that will overheat under load. Use the correct size wire or a larger terminal block.
10. What does the “AL/CU” marking on a terminal mean?
It means the terminal is certified for use with both aluminum (AL) and copper (CU) wires, preventing the galvanic corrosion that occurs when these two metals are improperly joined.
Conclusion: Craftsmanship in Every Connection
Proper terminal block wiring is more than just a technical task; it’s a reflection of a professional’s commitment to safety, reliability, and quality. That charred block of plastic I saw in the middle of the night wasn’t just a failed component—it was the result of a series of small, overlooked details.
By understanding these common mistakes and adopting a framework of planning, proper process, and proof, you can elevate your work from simply functional to truly robust. Treat every single connection as if your entire operation depends on it—because, as I’ve seen time and time again, it often does.
