Adhesive Lined vs Single Wall Tubing: Which to Choose

Adhesive Lined vs Single Wall Tubing: Which to Choose ?It was 2 AM, and a frantic call came in from a client. Their new, multi-million dollar automated farming system was down. A central field sensor had failed, halting the entire irrigation network during a critical dry spell. The potential crop loss was catastrophic. When my team arrived on-site, the cause of the failure was maddeningly simple. A single wire splice leading to the sensor, buried in damp soil, had corroded completely. The original installer had “protected” the connection with heat shrink tubing, but they had chosen the wrong kind. That small, seemingly insignificant choice cost the client tens of thousands of dollars in emergency repairs and lost productivity.
I’ve seen variations of this story play out for over 15 years as an application engineer. A wire repair on a boat’s bilge pump fails in an emergency. A critical connection in an industrial robot succumbs to cutting fluids. In almost every case, the root cause isn’t the quality of the splice itself, but the failure of its protection. The market offers two primary classes of heat shrink tubing: standard single wall and adhesive lined (or dual wall). To the untrained eye, they look similar. But as my client learned the hard way, choosing between them is one of the most critical decisions you can make to ensure the long-term reliability of any electrical system. This guide is the culmination of my experience, designed to give you the framework to make the right choice, every time.
Part 1: The Anatomy of Protection
To understand which tubing to use, you first need to understand how they are built and what they are designed to do. Think of it like the walls of a house 3. The walls provide structure, act as a barrier against the elements, and insulate against the cold. The walls of your heat shrink tubing are responsible for nearly all the protection it provides.
Single Wall Tubing: The Workhorse
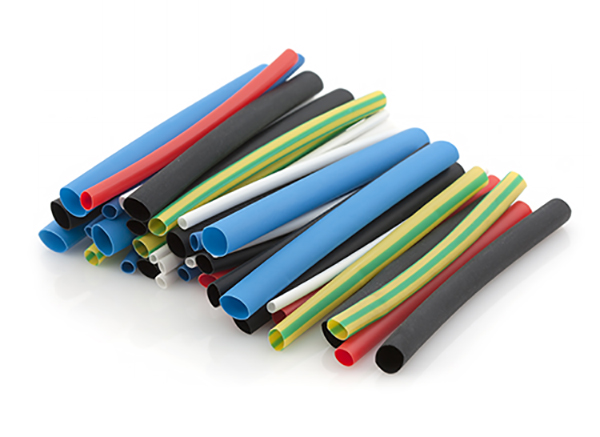
Single wall heat shrink tubing is the industry workhorse, and for good reason. It consists of a single layer of extruded thermoplastic, most commonly polyolefin. When heated, the material shrinks uniformly to conform to the shape of the object it’s covering.
Its primary jobs are:
- Insulation: Providing a basic dielectric barrier for low-voltage applications.
- Strain Relief: Reducing mechanical stress on wire terminations and solder joints.
- Mechanical Protection: Guarding against minor nicks, cuts, and abrasion in controlled environments.
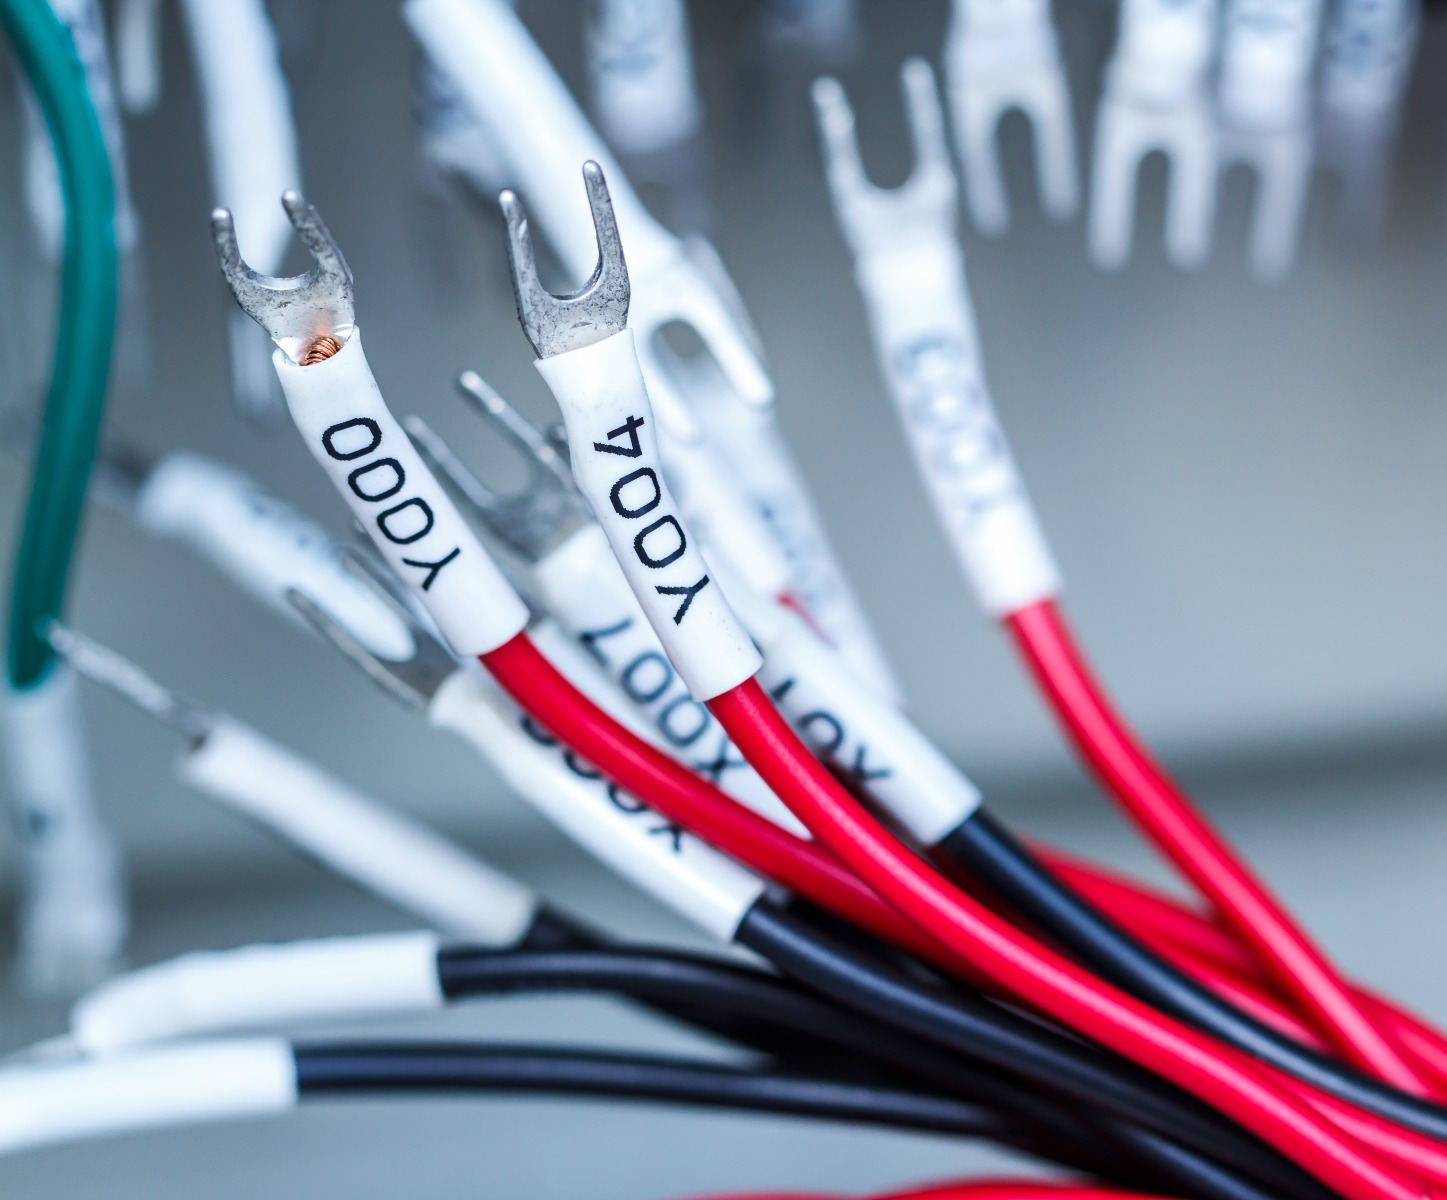
- Organization & Identification: Bundling wires together and providing color-coding for complex harnesses.
Single wall tubing is flexible, fast-shrinking, and cost-effective. It’s the perfect choice for applications inside a protected enclosure, like a PC build, a control panel, or consumer electronics. However, its limitation is crucial to understand: it is not waterproof. It’s a raincoat, not a drysuit. It will shed a splash, but it will not protect against submersion or even persistent condensation.
Adhesive Lined (Dual Wall) Tubing: The Fortress
This is where true environmental protection begins. Adhesive lined tubing, also called dual wall, is a co-extruded product with two distinct layers: a durable, cross-linked polyolefin outer jacket (the first wall) and a specially formulated thermoplastic adhesive inner liner (the second wall) 4.
When you apply heat, something remarkable happens. As the outer jacket shrinks to provide mechanical protection, the inner adhesive layer melts and flows. This molten adhesive is forced into every tiny crack and crevice of the underlying component. As it cools, it forms a solid, semi-rigid barrier that creates a complete environmental seal. This seal is the critical difference. It doesn’t just cover the connection; it bonds to it, locking out moisture, chemicals, salt spray, and other corrosive agents.
This is your drysuit. It’s what you use when failure is not an option in a harsh environment—automotive engine bays, marine applications, outdoor lighting, and direct burial splices.
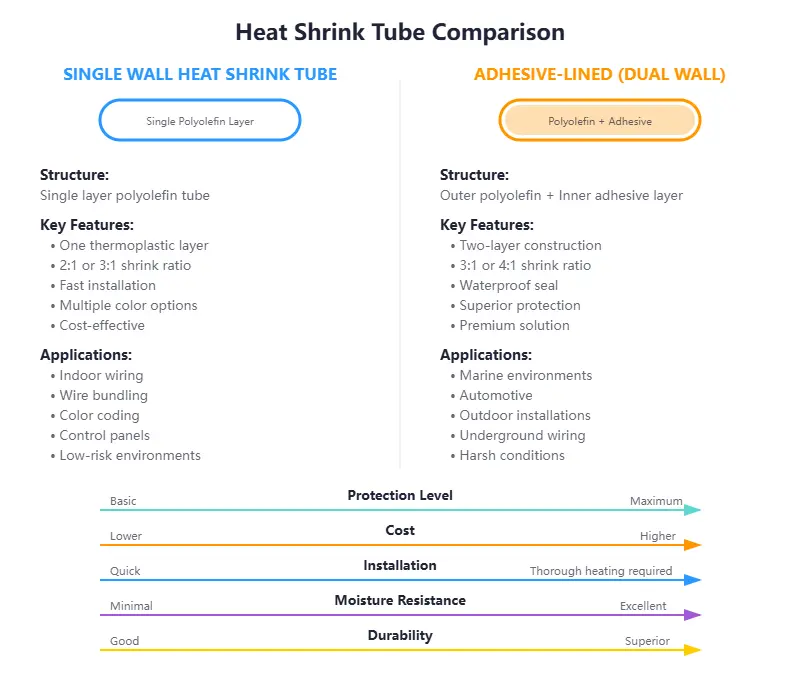
Heat Shrink Tube Comparison
Part 2: The Engineering Showdown: A Head-to-Head Comparison
Understanding the fundamental difference is one thing; seeing the data is another. I’ve compiled a comprehensive comparison table based on typical industry specifications and my own field experience. A glance at this chart often makes the decision for you.
| Feature | Single Wall Heat Shrink | Adhesive Lined (Dual Wall) Heat Shrink |
|---|---|---|
| Construction | Single layer of polyolefin | Dual layer: outer polyolefin jacket, inner adhesive liner |
| Moisture Protection | Minimal (splash resistant) | Excellent (waterproof, submersible, hermetic seal) |
| Environmental Seal | None; provides only dust and debris protection | Superior; protects against moisture, chemicals, fuel, and salt |
| Abrasion Resistance | Good | Excellent; the dual layers provide enhanced toughness |
| Tensile Strength | ~1,500 psi | ~2,000+ psi; adhesive adds significant pull-out strength |
| Operating Temperature | Typically -55°C to +135°C | Typically -55°C to +130°C |
| Common Shrink Ratios | 2:1, 3:1 | 3:1, 4:1, up to 6:1 |
| Installation | Fast; requires less heat and time | Slower; requires thorough heating to activate adhesive |
| Flexibility | Remains highly flexible after shrinking | Becomes semi-rigid after adhesive cures, providing more support |
| Relative Cost | Low | Higher (typically 2-3x more than single wall) |
| Typical Applications | Indoor wiring, cable management, color-coding, hobbyist electronics | Outdoor, marine, automotive, industrial, direct burial, connector sealing |
Deep Dive 1: The Critical Nature of the Environmental Seal
The most important takeaway from the table above is the difference in sealing capability. I cannot overstate this. Adhesive lined tubing creates a true hermetic seal; single wall tubing only offers minor contaminant protection. Water is the enemy of every electrical connection. It wicks its way into the tiniest gaps through capillary action, and once it’s in, it brings along dissolved salts and minerals that immediately begin the process of galvanic corrosion. A single wall tube may look sealed, but microscopic gaps at its ends are an open invitation for moisture. The flowing adhesive of a dual wall tube closes those gaps completely.
This sealing capability extends beyond just water. In industrial environments, that seal protects against cutting oils, hydraulic fluids, and cleaning solvents. In an automotive context, it guards against gasoline, diesel, and brake fluid. A single wall tube will quickly degrade when exposed to these aggressive chemicals, while the robust outer jacket and adhesive inner wall of a dual wall tube provide long-lasting protection.
Deep Dive 2: Mechanical Strength You Can’t Ignore
While we focus on the sealing properties, a frequently overlooked benefit of adhesive lined tubing is the dramatic increase in mechanical strength. The adhesive doesn’t just seal; it bonds the tubing to the wire insulation and the connector itself. This creates incredible strain relief and increases the pull-out strength of the termination. In high-vibration environments—think heavy machinery, vehicles, or aerospace applications—this bond is critical. It prevents micro-movements between the wire and the terminal that can lead to fretting corrosion and eventual connection failure. Single wall tubing provides strain relief, but it can still slide or shift under heavy vibration. An adhesive lined tube becomes a structural part of the connection.
Part 3: The 4-Step Engineer’s Selection Framework
Over the years, I’ve developed a simple but effective framework for selecting the right tubing for any job. It removes guesswork and forces you to consider the factors that truly matter for long-term reliability.
Step 1: Analyze the Operating Environment
This is the most important step. Before you even think about size or color, answer these questions about where the component will live:
- Will it be exposed to moisture? This includes rain, snow, washdowns, condensation, high humidity, or submersion. If the answer is yes to any of these, your choice is already made: you need adhesive lined tubing.
- What chemicals will it encounter? Consider fuels, oils, solvents, acids, or cleaning agents. Check the chemical resistivity chart for your chosen tubing material, but dual wall is almost always the safer bet.
- Is it outdoors? If so, you need a material that is UV resistant. Black heat shrink (both single and dual wall) almost always contains carbon black, which is an excellent UV inhibitor. For other colors, you must verify UV resistance on the datasheet.
- What is the temperature range? Consider both the ambient temperature and any heat generated by the components themselves. Ensure the tubing’s operating temperature range is sufficient .
Step 2: Define Mechanical & Electrical Requirements
Next, consider the physical and electrical stresses the tubing will endure.
- Vibration and Strain: Is the connection subject to movement, vibration, or pulling forces? If so, the superior bonding and rigidity of adhesive lined tubing are a major advantage.
- Abrasion: Will the cable be rubbing against a sharp edge or rough surface? While both types offer protection, heavy-duty, thick-wall adhesive lined tubing is designed for maximum abrasion resistance.
- Dielectric Strength: What is the voltage of the application? For high-voltage work, you must consult the datasheet and select a tubing with a sufficient dielectric strength rating (measured in volts per mil of thickness).
Step 3: Specify the Correct Size (The 25/50 Rule)
Choosing the wrong size is one of the most common installation mistakes. A tube that is too small won’t fit over the component, and one that is too large won’t shrink down enough to provide a tight fit.
- Expanded vs. Recovered ID: Tubing is specified by its supplied or Expanded Inner Diameter (ID) and its Recovered Inner Diameter (ID) . The Expanded ID must be large enough to easily slide over the largest part of your component, typically the connector housing. The Recovered ID must be smaller than the smallest part you need to seal, typically the wire jacket.
- The Engineer’s Rule of Thumb (The 25/50 Rule): To ensure a perfect fit and seal, I teach my junior engineers a simple rule. Select a tubing size where the component diameter is at least 25% larger than the tubing’s recovered diameter and at least 25% smaller than the tubing’s expanded diameter. This ensures the tubing has to work to shrink, providing maximum compression and sealing force.
- Shrink Ratio is Your Friend: The shrink ratio tells you how much the diameter will reduce. A 2:1 ratio means a 1/2″ tube will shrink to 1/4″. A 4:1 ratio means it will shrink to 1/8″. For applications with large differences in diameter, like sealing a connector backshell to a thin wire, a high shrink ratio (3:1 or 4:1) is essential. It allows one piece of tubing to cover both the large connector and the small wire, creating a clean, professional seal.
- Don’t Forget Length! All heat shrink tubing shrinks longitudinally (along its length) as it recovers, typically by 5-10%. Always cut your piece of tubing a little longer than you think you need to account for this.
Step 4: Plan for a Proper Installation
The best tubing in the world will fail if installed improperly.
- The Right Tool: Use a professional-grade heat gun with adjustable temperature settings. Never use a direct flame like a lighter or a torch. A flame is too hot, can scorch the tubing (compromising its integrity), and doesn’t distribute heat evenly.
- The Method: Start heating in the middle of the tubing and work your way out towards the ends. This pushes air out instead of trapping it, preventing voids. Keep the heat gun moving constantly to avoid overheating any single spot.
- The Golden Signal: For adhesive lined tubing, the most important part of the installation process is to continue heating until you see a small, clear bead of adhesive (a “fillet”) flow out from the ends of the tubing. This is your visual confirmation that the inner wall has fully melted and created a complete, waterproof seal. Without this signal, you must assume the seal is incomplete.
Part 4: Application in the Real World: Case Studies
Let’s apply this framework to a few common scenarios.
Case 1: The Server Rack (Single Wall)
- Scenario: Bundling and color-coding CAT6 cables inside a climate-controlled data center.
- Environment: Clean, dry, and temperature-stable. No moisture, no chemicals, no UV.
- Requirements: Basic strain relief at the connector, organization, and identification.
- Verdict: Single wall tubing is the perfect choice. It’s inexpensive, flexible, and easy to install. Using adhesive lined tubing here would be expensive overkill and would make future maintenance more difficult.
Case 2: The Automotive Engine Bay (Adhesive Lined)
- Scenario: Splicing a wire for a new fuel injector.
- Environment: Extreme. High vibration, wide temperature swings (-20°C to 120°C), and exposure to fuel, oil, and washer fluid.
- Requirements: Perfect, long-term environmental seal. High vibration resistance. Absolute reliability.
- Verdict: Adhesive lined tubing is non-negotiable. The semi-rigid, bonded seal will withstand the vibration and temperature cycling, while the adhesive will prevent corrosive fluids from ever reaching the copper splice.
Case 3: The Outdoor Lighting Repair (Adhesive Lined, High Shrink Ratio)
- Scenario: Repairing the cable on a landscape lighting fixture where the connector has failed.
- Environment: Fully exposed to rain, snow, soil, and UV rays.
- Requirements: A fully submersible, direct-burial-rated seal. The repair must cover the bulky new butt splice and seal tightly onto the original thin cable jacket.
- Verdict: 4:1 shrink ratio, adhesive lined tubing. The high shrink ratio is critical to accommodate the large diameter of the butt splice while still recovering tightly on the cable. The adhesive seal is essential for direct burial and long-term water protection.
Frequently Asked Questions (FAQ)
Q: How do I know for sure that the adhesive seal is complete?
A: The visual confirmation is key. You must see a small, even ring of shiny adhesive peeking out from both ends of the tubing. This tells you the adhesive has melted, flowed the full length of the tube, and encapsulated the connection.
Q: Can I just use a lighter if I don’t have a heat gun?
A: As an engineer, my answer is an emphatic no. A lighter produces an uncontrolled, dirty flame that can easily burn and weaken the tubing. The soot from the flame can also create conductive paths. A proper heat gun is a relatively inexpensive tool and is essential for a professional, reliable installation.
Q: Is the higher cost of adhesive lined tubing really justified?
A: Think back to the story that opened this article. The cost of the correct adhesive lined tubing for that job was less than a dollar. The cost of the failure was tens of thousands. The added cost of adhesive lined tubing is not a cost; it’s the cheapest insurance you will ever buy.
Conclusion: The Engineer’s Verdict
The choice between single wall and adhesive lined heat shrink tubing is not a matter of preference; it is a matter of engineering discipline. The decision tree is simple. If your application exists in a clean, dry, stable environment, single wall tubing is an excellent and cost-effective tool for insulation and strain relief.
However, for any application that will be exposed to moisture, chemicals, or significant vibration, adhesive lined heat shrink tubing is not optional—it is a professional requirement. The initial investment is minuscule compared to the cost, danger, and frustration of a failure in the field. Don’t let a fifty-cent component compromise a thousand-dollar system. Analyze your environment, follow the framework, and choose the tubing that guarantees your work will last.
