Common Installation Mistakes with Waterproof Wire Nuts and How to Avoid Them
Introduction
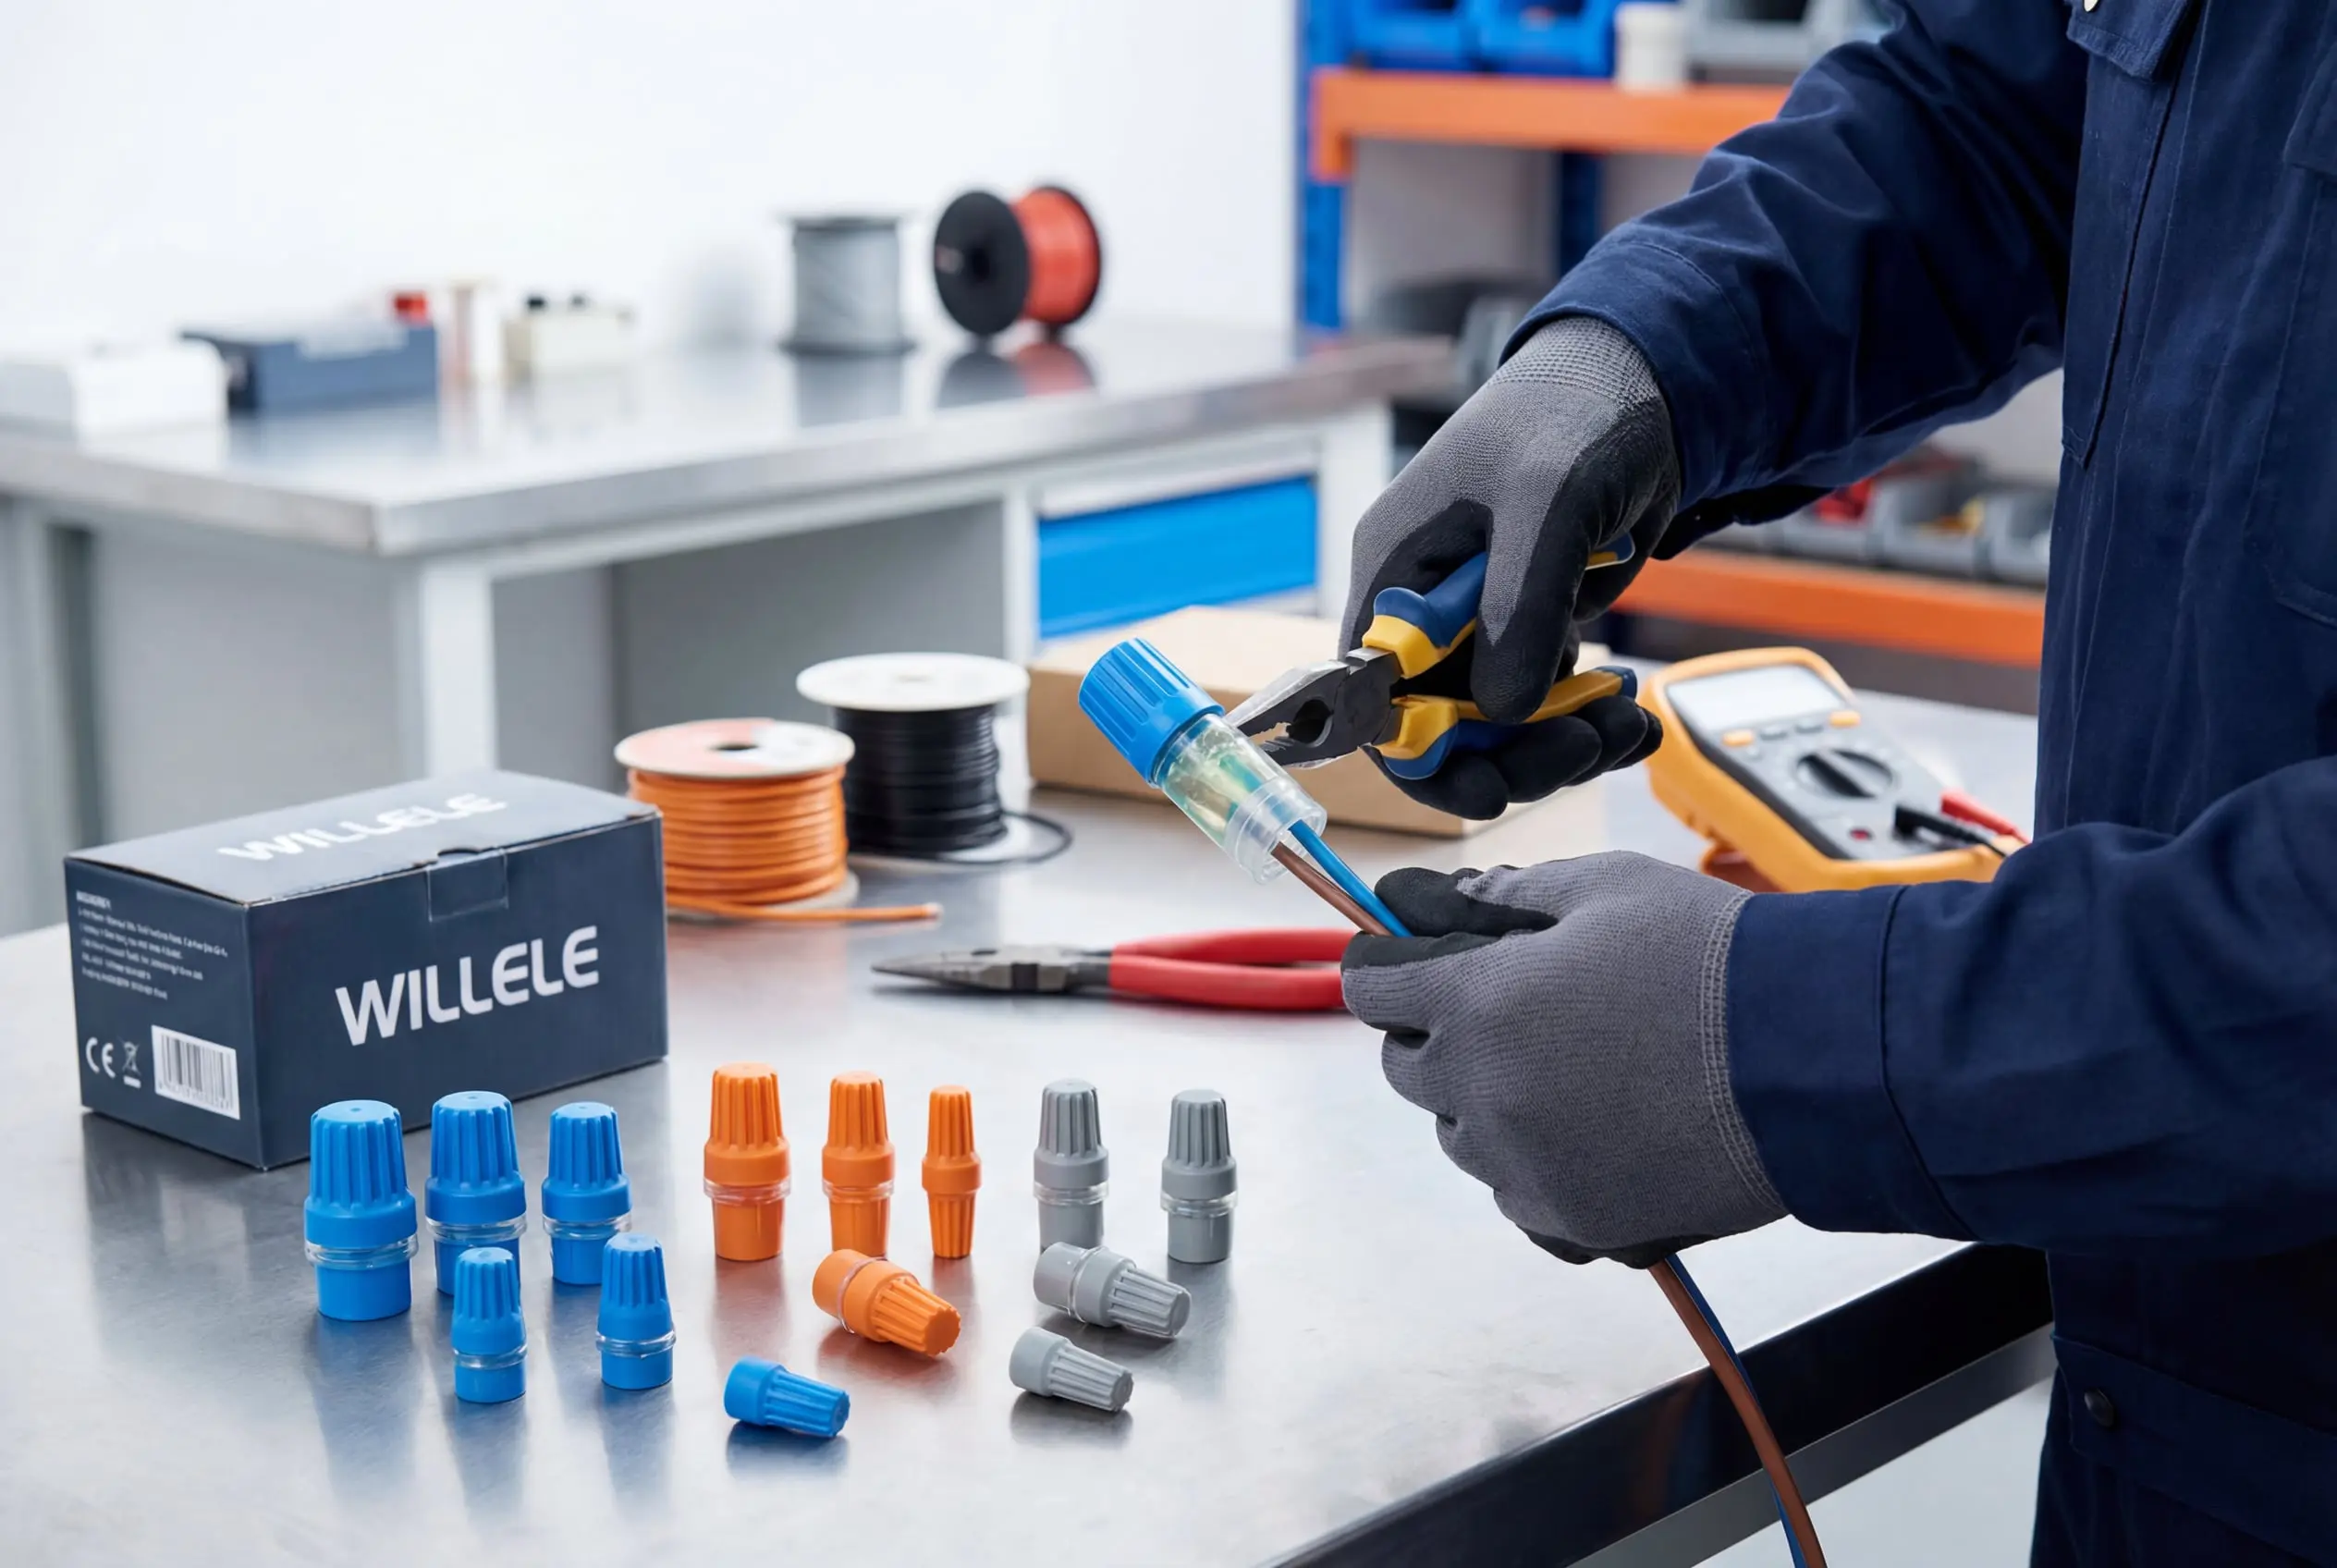
Proper installation of waterproof wire nuts is critical for ensuring electrical safety, system reliability, and long-term performance in moisture-prone environments. Despite their straightforward design, installation errors can lead to corrosion, connection failure, electrical hazards, and costly system downtime. At willele Electric, a leading B2B manufacturer specializing in heat shrink tubes and waterproof wire connectors, we’ve identified recurring installation mistakes that compromise connection integrity across industrial, commercial, and residential applications.
This comprehensive guide examines common installation mistakes with waterproof wire nuts and how to avoid them, providing electrical contractors, maintenance professionals, and procurement specialists with actionable best practices to ensure reliable, code-compliant installations.
Understanding Waterproof Wire Nuts
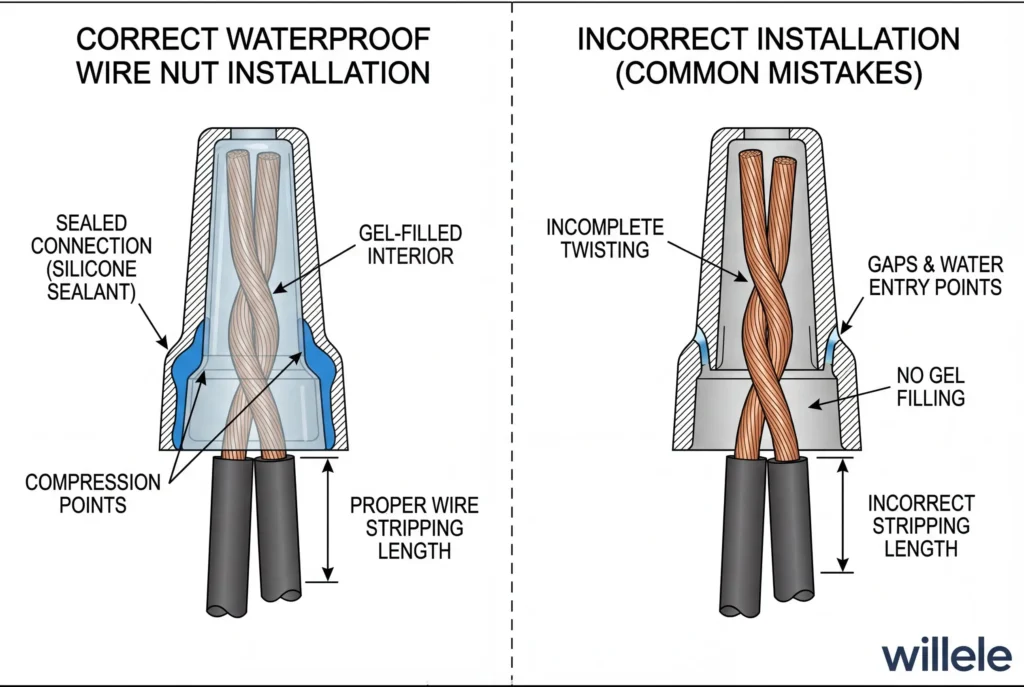
Waterproof wire nuts, also known as moisture-resistant wire connectors or gel-filled wire nuts, are specialized electrical connectors designed to protect wire splices from water ingress, humidity, and environmental contamination. Unlike standard twist-on wire connectors, waterproof wire nuts incorporate silicone sealant, thermoplastic gel, or other moisture-barrier materials that create a hermetic seal around the connection point.
Key Components
- Outer Shell: Durable plastic housing with threading for secure wire grip
- Internal Spring: Provides consistent pressure on twisted wires
- Sealant Medium: Silicone gel or dielectric grease that fills voids and displaces moisture
- Sealing Skirt: Flexible extension that conforms to wire insulation
Applications
Waterproof wire nuts are essential for:
- Outdoor lighting installations
- Underground electrical systems
- Marine and dock electrical work
- HVAC equipment connections
- Landscape irrigation controls
- Wet location applications per NEC requirements
Why Proper Installation Matters
Safety Implications
Improper installation of waterproof wire nuts creates immediate and long-term safety hazards:
- Electrical Shock Risk: Moisture penetration reduces insulation resistance
- Arc Fault Potential: Poor connections generate heat and sparking
- Fire Hazards: Corroded connections increase resistance and heat buildup
- Equipment Damage: Water ingress causes short circuits in connected devices
Reliability Consequences
Installation mistakes directly impact system performance:
- Intermittent Failures: Corroded connections create unreliable electrical paths
- Voltage Drop: Increased resistance reduces power delivery efficiency
- Premature Component Failure: Unstable connections stress connected equipment
- System Downtime: Failed connections require emergency repairs and replacements
Cost Considerations
Poor installation practices result in measurable financial impact:
- Warranty Voidance: Improper installation often voids manufacturer warranties
- Increased Maintenance: Frequent repairs and replacements escalate labor costs
- Liability Exposure: Code violations and safety incidents create legal risks
- Project Delays: Rework extends project timelines and increases overhead
Common Installation Mistakes and Solutions
Mistake #1: Insufficient Wire Stripping
The Problem: Many installers strip too little or too much insulation from wire ends, compromising connection quality. Under-stripping prevents adequate conductor contact, while over-stripping exposes excessive bare wire beyond the connector’s protective envelope.
The Solution: Strip wires to the manufacturer’s specified length, typically 5/8 to 3/4 inch (16-19mm) for standard wire nuts. Use quality wire strippers calibrated to the specific wire gauge. Ensure all conductors are stripped to identical lengths for uniform connection depth.
Best Practice: Mark the stripping length on your wire stripper with tape or a permanent marker for consistent results across multiple connections.
Mistake #2: Failing to Pre-Twist Wires
The Problem: Attempting to twist wires solely with the wire nut creates uneven tension, incomplete contact, and weak mechanical connections. This lazy shortcut significantly reduces connection reliability.
The Solution: Always pre-twist the stripped conductors clockwise using lineman’s pliers before applying the wire nut. Create 3-4 tight turns that hold the wires firmly together. The pre-twisted bundle should feel solid and show no gaps between conductors.
Best Practice: For solid conductors, stagger wire ends by 1/8 inch before twisting to ensure all wires engage simultaneously.
Mistake #3: Incorrect Torque Application
The Problem: Over-tightening can damage the internal spring mechanism, crack the plastic housing, or deform conductors. Under-tightening leaves loose connections that vibrate free, create resistance, and allow moisture penetration.
The Solution: Follow manufacturer torque specifications, typically 4-5 clockwise turns until resistance is felt, then an additional 1/2 turn. The connection should feel snug but not require excessive force.
Best Practice: For critical installations, use a torque-limiting screwdriver or calibrated installation tool to ensure consistent application pressure.
Mistake #4: Mixing Wire Types Improperly
The Problem: Combining solid and stranded conductors without proper technique creates uneven pressure distribution. Stranded wires compress while solid wires remain rigid, leading to poor contact and eventual loosening.
The Solution: When mixing conductor types is unavoidable, position solid conductors on the inside of the twist and stranded conductors on the outside. Use wire nuts specifically rated for mixed-conductor applications. Alternatively, tin stranded wire ends with solder to create pseudo-solid conductors.
Best Practice: Whenever possible, use the same conductor type (all solid or all stranded) within a single connection point.
Mistake #5: Ignoring Wire Gauge Compatibility
The Problem: Using wire nuts outside their rated wire gauge range leads to insufficient grip (undersized connectors) or inability to create adequate compression (oversized connectors). Both scenarios compromise electrical and mechanical integrity.
The Solution: Verify wire gauge compatibility before installation. Select wire nuts specifically rated for the wire sizes being connected. When connecting wires of different gauges, ensure the connector accommodates the full range.
Best Practice: Color-code your wire nut inventory by capacity and maintain a compatibility chart at the work site.
Wire Gauge Compatibility Table
| Wire Nut Size | Solid Wire Capacity | Stranded Wire Capacity | Typical Color Code | Max Fill |
|---|---|---|---|---|
| Small | (2) 18-16 AWG | (2) 18-16 AWG | Orange | 2 wires |
| Standard | (2-3) 14-12 AWG | (2-3) 16-14 AWG | Yellow | 3 wires |
| Medium | (2-4) 12-10 AWG | (2-3) 14-12 AWG | Red | 4 wires |
| Large | (2-3) 10-8 AWG | (2-3) 12-10 AWG | Blue | 3 wires |
| Extra Large | (2) 8-6 AWG | (2) 10-8 AWG | Gray | 2 wires |
Mistake #6: Installing in Contaminated Conditions
The Problem: Installing waterproof wire nuts on wet, dirty, or contaminated conductors traps moisture and debris inside the connection, defeating the waterproofing purpose. Oil, grease, and oxidation on wire surfaces create insulating barriers that increase resistance.
The Solution: Clean and dry all conductors before installation. Use electrical contact cleaner or isopropyl alcohol to remove contaminants. Dry wires thoroughly with compressed air or lint-free cloths. Work in dry conditions whenever possible.
Best Practice: For outdoor installations, use a portable canopy or work during favorable weather. Keep wire nuts sealed in their packaging until ready for immediate use.
Mistake #7: Incomplete Gel Distribution
The Problem: Gel-filled waterproof wire nuts require proper installation technique to distribute sealant throughout the connection void. Rushing the installation or improper orientation prevents complete gel flow, leaving air pockets that allow moisture ingress.
The Solution: After tightening the wire nut, invert the connection (wire nut facing down) for 30 seconds to allow gravity to help distribute gel around all conductors. Gently squeeze the wire nut body to promote gel flow into voids.
Best Practice: For critical applications in constant-immersion environments, consider supplemental sealing with heat shrink tubing or silicone tape over the wire nut assembly.
Mistake #8: Neglecting Conductor Oxidation Removal
The Problem: Aluminum and copper wires develop oxide layers that act as insulators, increasing connection resistance and heat generation. Connecting oxidized conductors without surface preparation leads to eventual failure.
The Solution: For aluminum conductors, remove oxidation with a wire brush or abrasive pad immediately before connection. Apply antioxidant compound rated for electrical connections. For copper in marine environments, clean with fine sandpaper or specialized copper cleaner.
Best Practice: Use inhibitor compounds specifically formulated for the conductor material. Apply inhibitor to the stripped portion before twisting and connecting.

Mistake #9: Inadequate Pull Testing
The Problem: Skipping mechanical verification allows weak connections to remain undetected until field failure occurs. Many installers assume visual inspection is sufficient.
The Solution: After installation, perform a firm pull test on each conductor. Grasp the wire nut with one hand and each conductor with the other, applying moderate tension (5-10 pounds of force). No wire should pull free or slide within the connector.
Best Practice: Make pull testing standard procedure for every connection. Failed connections are easy to correct immediately but costly to repair after system energization.
Mistake #10: Improper Orientation in Junction Boxes
The Problem: Installing wire nuts with the connection facing upward in outdoor junction boxes allows water to pool around the connection point, overwhelming the sealant’s capacity.
The Solution: Orient wire nut connections with the wire nut body facing downward or horizontally to promote water drainage away from the connection. Ensure junction box has proper drain holes and is rated for wet locations.
Best Practice: Use junction boxes with built-in drip loops and seal all conduit entries with appropriate fittings and sealants.
Installation Mistakes and Solutions Summary Table
| Mistake | Consequence | Solution | Prevention Method |
|---|---|---|---|
| Insufficient wire stripping | Poor conductor contact | Strip 5/8-3/4 inch per spec | Use calibrated wire strippers |
| No pre-twisting | Weak mechanical bond | Pre-twist 3-4 turns with pliers | Make pre-twisting mandatory procedure |
| Incorrect torque | Damaged connector or loose joint | 4-5 turns plus 1/2 turn | Use torque-limiting tools |
| Mixed wire types | Uneven pressure distribution | Position solid wires inside | Use same conductor types |
| Wrong gauge compatibility | Inadequate grip or compression | Verify rating before selection | Maintain compatibility chart |
| Contaminated installation | Trapped moisture and debris | Clean and dry before connection | Work in controlled conditions |
| Incomplete gel distribution | Air pockets allow moisture | Invert connection 30 seconds | Follow gel flow procedures |
| Oxidized conductors | High resistance connection | Clean and apply inhibitor | Pre-treat conductors |
| No pull testing | Undetected weak connections | Test each wire with 5-10 lbs force | Make testing standard practice |
| Improper orientation | Water accumulation | Orient downward in wet locations | Design proper drainage |
Step-by-Step Proper Installation Procedure
Phase 1: Preparation
- Verify Compatibility: Confirm wire nut rating matches wire gauge and quantity
- Inspect Components: Check wire nut for damage, ensure gel is present in sealed units
- Prepare Workspace: Ensure clean, dry working conditions
- Gather Tools: Wire strippers, lineman’s pliers, torque screwdriver (if specified)
Phase 2: Wire Preparation
- Strip Insulation: Remove 5/8-3/4 inch of insulation from each conductor
- Clean Conductors: Remove oxidation and contaminants with appropriate cleaner
- Dry Thoroughly: Eliminate all moisture from stripped wire sections
- Align Ends: Ensure all conductors are stripped to equal length
Phase 3: Connection Assembly
- Pre-Twist Conductors: Create 3-4 tight clockwise turns using pliers
- Apply Wire Nut: Thread connector clockwise over pre-twisted wires
- Tighten Properly: Turn 4-5 times until resistance, then add 1/2 turn
- Verify Insertion: Check that no bare wire extends beyond connector skirt
Phase 4: Verification
- Pull Test: Apply firm tension to each wire individually
- Visual Inspection: Confirm complete gel coverage (if applicable)
- Orientation Check: Ensure proper positioning for drainage
- Documentation: Record connection details for maintenance records
Torque Specifications and Installation Requirements
| Wire Nut Category | Recommended Turns | Pull Test Force | Installation Torque | Temperature Range |
|---|---|---|---|---|
| Small (18-16 AWG) | 3-4 plus 1/2 | 5 lbs per wire | Hand-tight | -40°C to 105°C |
| Standard (14-12 AWG) | 4-5 plus 1/2 | 8 lbs per wire | 4-5 in-lbs | -40°C to 105°C |
| Medium (12-10 AWG) | 5-6 plus 1/2 | 10 lbs per wire | 6-8 in-lbs | -40°C to 105°C |
| Large (10-8 AWG) | 5-6 plus 1/2 | 12 lbs per wire | 8-10 in-lbs | -40°C to 105°C |
| Extra Large (8-6 AWG) | 6-7 plus 1/2 | 15 lbs per wire | 10-12 in-lbs | -40°C to 105°C |
Quality Assurance and Testing Methods
Initial Installation Testing
Mechanical Testing:
- Pull test: 5-15 lbs force depending on wire gauge
- Twist resistance: Connection should not rotate when wire nut is grasped
- Visual inspection: No exposed conductors, complete gel coverage
Electrical Testing:
- Continuity verification using multimeter
- Insulation resistance testing (megohmmeter) for critical circuits
- Thermal imaging after energization to detect hot spots
Environmental Stress Testing
For critical applications, consider:
- Water immersion testing: Submerge completed connections for 24 hours, then test insulation resistance
- Freeze-thaw cycling: Expose to temperature extremes to verify seal integrity
- Vibration testing: Simulate mechanical stress in mobile or high-vibration applications
Environmental Conditions and Connector Selection
| Environment | Moisture Exposure | Required IP Rating | Recommended Connector Type | Additional Protection |
|---|---|---|---|---|
| Indoor Dry | Minimal | IP20 | Standard wire nut | None required |
| Indoor Damp | Occasional | IP44 | Basic waterproof | Sealed junction box |
| Outdoor Protected | Regular | IP54 | Gel-filled waterproof | Weatherproof enclosure |
| Outdoor Exposed | Constant | IP65 | Premium waterproof | Heat shrink + sealant |
| Direct Burial | Continuous immersion | IP68 | UL Listed direct burial | Encapsulated connection |
| Marine/Dock | Saltwater exposure | IP68 | Marine-grade silicone | Stainless hardware |
Maintenance and Inspection Guidelines
Routine Inspection Schedule
Annual Inspections: All outdoor and exposed connections
- Visual examination for physical damage or degradation
- Thermal imaging scan during peak load conditions
- Junction box integrity verification
Quarterly Inspections: Critical systems and harsh environments
- Connection tightness verification
- Moisture intrusion signs
- Corrosion indicators on conductors or hardware
Monthly Inspections: Direct burial and submersible applications
- Enclosure seal integrity
- Abnormal heating or discoloration
- Performance monitoring of connected equipment
Signs of Installation Problems
Watch for these failure indicators:
- Discoloration: Brown, black, or green discoloration indicates overheating or corrosion
- Visible Corrosion: White or green residue on conductors or connector threads
- Loose Connections: Wire nuts that rotate freely or wires that pull out easily
- Melted Insulation: Evidence of excessive heat generation
- Intermittent Operation: Connected equipment operates erratically
- Moisture Presence: Water inside junction boxes or around connections
Troubleshooting Guide
| Symptom | Probable Cause | Diagnostic Method | Corrective Action |
|---|---|---|---|
| Intermittent circuit operation | Loose connection | Pull test, wiggle wires | Re-terminate with proper technique |
| Excessive heat at connection | High resistance | Thermal imaging, voltage drop test | Clean conductors, remake connection |
| Visible corrosion | Moisture intrusion | Inspect seal integrity | Replace connector, improve enclosure |
| Connection pulls apart easily | Under-tightened or wrong size | Pull test, gauge verification | Use correct size, proper torque |
| Discolored insulation | Overheating from poor contact | Visual inspection, IR thermography | Remake connection with clean wire |
| Equipment malfunction | Voltage drop across connection | Voltage measurement under load | Check all connections in circuit |
Best Practices for Professional Installation
Pre-Installation Planning
- Material Selection: Choose connectors rated for specific environmental conditions
- Quantity Estimation: Calculate required quantities with 10% overage for waste
- Tool Preparation: Ensure all tools are calibrated and in good condition
- Weather Monitoring: Schedule outdoor work during dry conditions
During Installation
- Batch Processing: Complete similar connections together for consistency
- Quality Checkpoints: Inspect every 10th connection for technique verification
- Documentation: Photograph critical connections before enclosure
- Labeling: Mark circuits clearly for future maintenance
Post-Installation Verification
- Comprehensive Testing: Test all connections before final closeout
- Thermal Survey: Scan energized circuits with thermal camera
- Client Handoff: Provide maintenance recommendations and inspection schedule
- Warranty Documentation: Record installation details for warranty compliance
Procurement Considerations for B2B Buyers
When sourcing waterproof wire nuts from manufacturers like willele Electric, evaluate:
Product Specifications
- UL/CSA listing for intended applications
- IP rating verification and test reports
- Temperature range certification
- Chemical resistance data for specific environments
Supplier Capabilities
- Technical support availability
- Custom specification capability
- Inventory reliability and lead times
- Bulk pricing and volume discounts
Quality Assurance
- Manufacturing quality certifications (ISO 9001)
- Lot traceability and batch testing
- Warranty terms and claims process
- Field failure rate data
FAQ Section
Q1: Can I reuse waterproof wire nuts if I need to modify a connection?
No, waterproof wire nuts should not be reused. Once installed, the internal sealant distributes around the conductors and cannot be effectively repositioned. The mechanical grip may also be compromised during removal. Reusing waterproof connectors defeats their moisture protection and voids manufacturer warranties. Always use fresh connectors for any connection modification or repair work.
Q2: How do I know if I’ve tightened a waterproof wire nut enough?
Proper tightening requires 4-5 full clockwise rotations until you feel significant resistance, followed by an additional 1/2 turn. The connector should feel snug but should not require excessive force that risks damaging the housing or internal components. After installation, perform a pull test—grasp each wire and apply 5-15 lbs of force (depending on wire gauge). No wire should slip or pull free. If wires move, the connection is under-tightened and must be remade.
Q3: What’s the difference between gel-filled and grease-filled waterproof wire nuts?
Gel-filled wire nuts contain silicone-based compounds that remain semi-solid and provide superior moisture exclusion, especially in immersion applications. They maintain consistency across wide temperature ranges and don’t migrate out of the connection over time. Grease-filled connectors use petroleum-based dielectric compounds that offer good moisture displacement but may separate or leak at temperature extremes. For marine, direct burial, and critical outdoor applications, gel-filled connectors provide superior long-term protection. willele Electric offers both types with detailed application guidance.
Q4: Can waterproof wire nuts be used with aluminum wiring?
Yes, but only if specifically rated for aluminum conductors. Look for connectors marked “AL/CU” or “AL-rated.” Standard copper-only wire nuts are not suitable for aluminum due to galvanic corrosion concerns and different conductor properties. When using aluminum-rated waterproof wire nuts, always apply antioxidant compound to cleaned aluminum conductors before connection. Follow manufacturer torque specifications carefully, as aluminum requires different tightening procedures than copper. Never mix aluminum and copper conductors in the same connection without appropriate transition methods.
Q5: How long do waterproof wire nuts last in outdoor applications?
Quality waterproof wire nuts properly installed can last 15-25 years in typical outdoor applications. Service life depends on environmental factors including UV exposure, temperature cycling, moisture levels, and mechanical stress. Premium silicone gel-filled connectors in protected junction boxes typically outlast the connected equipment. Harsh environments like direct burial or constant immersion may reduce lifespan to 10-15 years. Regular inspections per NEC requirements help identify degradation before failure occurs. willele Electric waterproof connectors are engineered for extended service life with proper installation and maintenance.
Q6: What should I do if water is present in a junction box with waterproof wire nuts?
First, de-energize the circuit immediately if possible. Waterproof wire nuts prevent moisture from entering the connection but are not designed to operate submerged in standing water. Remove standing water and identify the source—improper box sealing, damaged gaskets, or inadequate drainage. Inspect all connections for signs of moisture intrusion (corrosion, discoloration). If connections appear compromised, replace them with fresh waterproof wire nuts after ensuring conductors are completely dry. Improve the junction box installation by adding drain holes, repositioning for better orientation, upgrading to higher IP-rated enclosures, or relocating to a better-protected location. Document the incident for maintenance records.
Conclusion
Avoiding common installation mistakes with waterproof wire nuts requires attention to detail, proper technique, and quality materials. By following manufacturer specifications, implementing systematic installation procedures, and conducting thorough verification testing, electrical professionals can ensure reliable, code-compliant connections that withstand environmental challenges for years of trouble-free service.
At willele Electric, we’re committed to supporting electrical contractors and maintenance professionals with high-quality waterproof wire connectors, comprehensive technical documentation, and expert application support. Our engineering team is available to assist with product selection, installation guidance, and troubleshooting for your specific environmental conditions and performance requirements.
For detailed product specifications, installation training resources, or technical consultation regarding waterproof wire nuts and how to avoid installation mistakes, contact willele Electric’s technical support team today.
