
Using Junction Boxes for LED Strip Lighting Projects

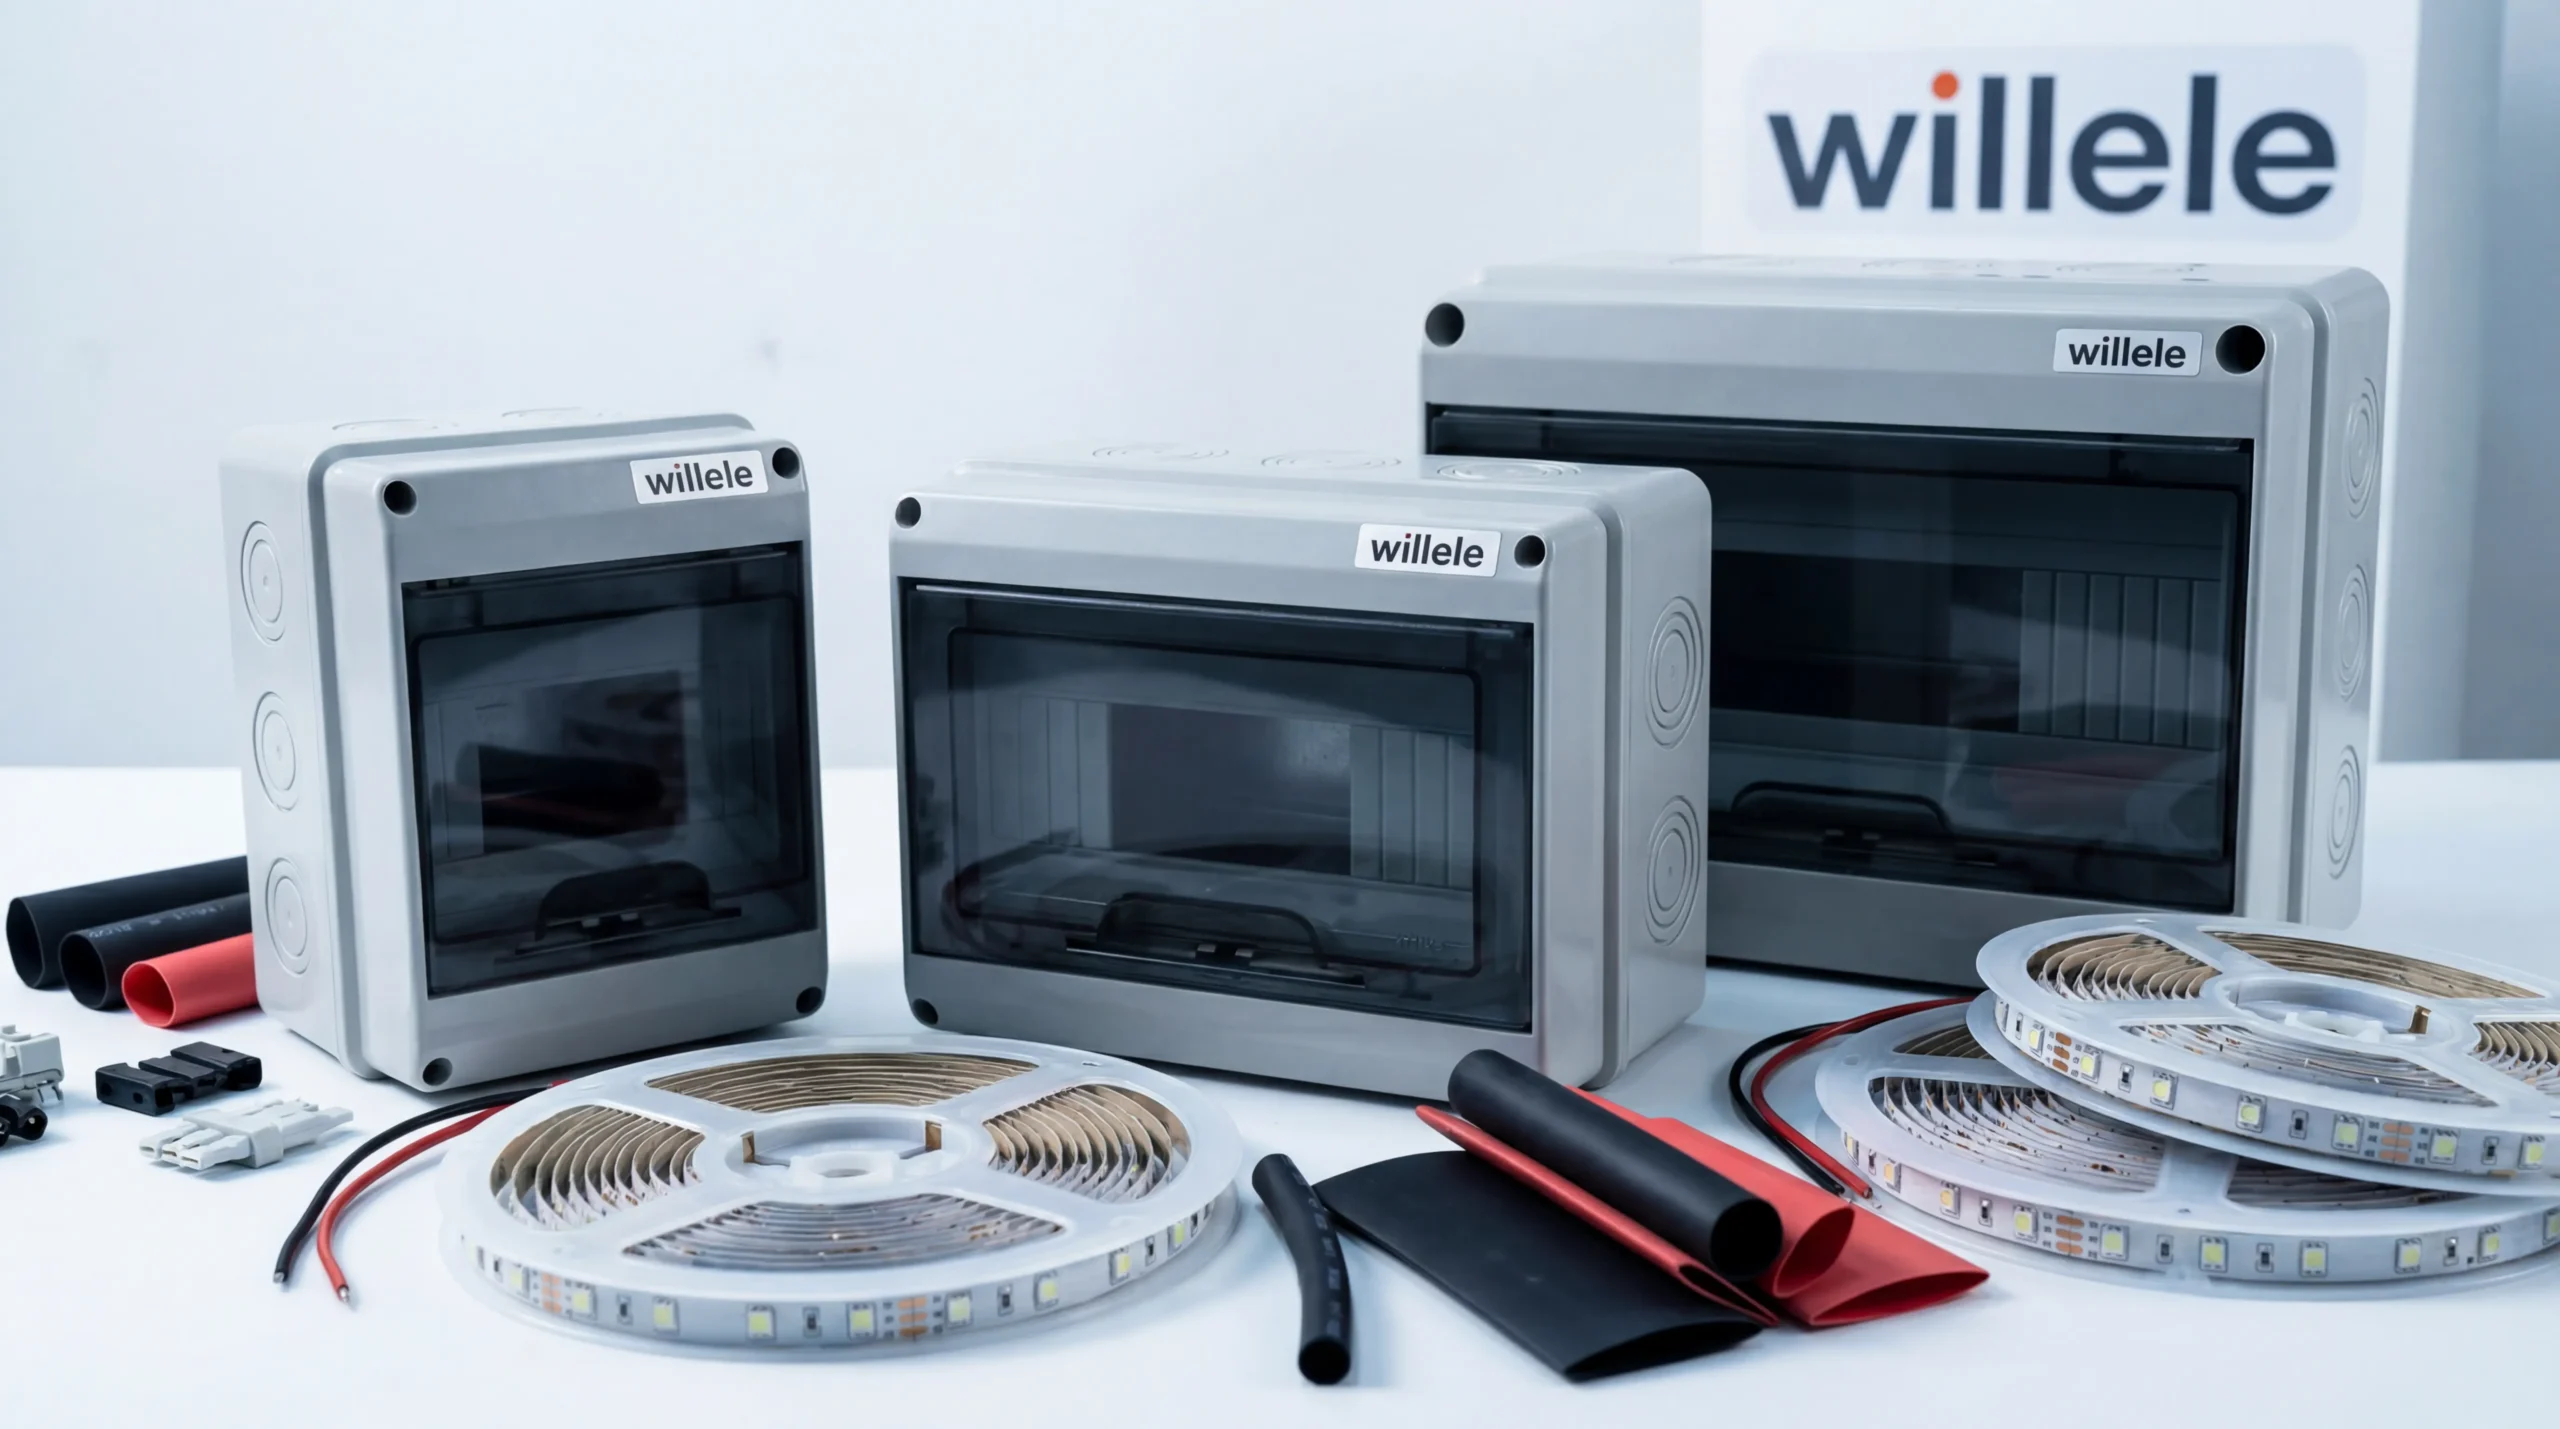
LED strip lighting has revolutionized modern illumination, offering versatile, energy-efficient solutions for residential, commercial, and industrial applications. From accent lighting in retail displays to task lighting in workshops, LED strips provide flexible design options that traditional fixtures cannot match. However, the success and longevity of any LED strip lighting installation depends critically on proper electrical connections and protection. Junction boxes serve as the essential hub where power distribution, wire management, and environmental protection converge, ensuring safe, code-compliant, and reliable LED lighting systems.
This comprehensive guide explores the strategic use of junction boxes in LED strip lighting projects, examining selection criteria, installation best practices, and the critical role of heat shrink protection in creating professional-grade installations that withstand years of service.
Understanding Junction Boxes in LED Strip Lighting Systems
A junction box functions as a protective enclosure that houses electrical connections, providing a centralized point where incoming power lines connect to LED strip circuits. In LED strip lighting applications, junction boxes serve multiple critical functions beyond simple wire containment. They protect connections from physical damage, environmental exposure, and accidental contact, while also organizing complex wiring configurations that often involve multiple LED strip runs, dimming controls, and power distribution networks.
Modern LED strip installations typically operate on either line voltage (120V/240V AC) or low voltage (12V/24V DC) systems. Line voltage systems require junction boxes that meet stringent electrical codes for AC wiring, with proper cable entry knockouts, grounding provisions, and adequate internal volume for wire connections and any required rectifiers or drivers. Low voltage systems, while operating at safer voltages, still benefit from junction box protection to organize connections, prevent short circuits, and maintain clean, professional installations.
The junction box also addresses a fundamental challenge in LED strip lighting: power distribution across extended runs. LED strips experience voltage drop over distance, causing brightness variations and color shifts if not properly managed. Strategic placement of junction boxes enables parallel power distribution, where multiple LED strip segments receive power from a central point rather than daisy-chaining end-to-end. This parallel configuration maintains consistent voltage across all strips, ensuring uniform illumination throughout the installation. citation
Types of Junction Boxes for LED Applications
Selecting the appropriate junction box type depends on installation environment, voltage requirements, and the complexity of the LED strip configuration.
Standard Electrical Junction Boxes
Traditional metal or plastic junction boxes designed for general electrical work can serve LED strip applications when properly sized and rated. Metal boxes offer superior durability and automatic grounding through conduit connections, making them ideal for commercial and industrial installations where mechanical protection is paramount. The metal construction also provides electromagnetic shielding, reducing potential interference with sensitive electronic drivers or controllers.
Plastic junction boxes, typically constructed from PVC or ABS, offer corrosion resistance and electrical isolation, making them suitable for damp locations or outdoor installations when rated appropriately. These boxes are lighter and easier to mount than metal alternatives, though they provide less mechanical protection and may degrade under prolonged UV exposure unless specifically rated for outdoor use.
Standard junction boxes must be sized according to electrical code requirements, which specify minimum internal volume based on the number and gauge of conductors, wire connectors, and devices contained within. Overcrowded junction boxes create installation difficulties, increase fire risk through poor heat dissipation, and violate code requirements that can result in failed inspections.
Specialized LED Junction Boxes with Integrated Drivers
Advanced junction boxes designed specifically for LED strip lighting incorporate integrated power supplies or rectifiers, combining connection protection with power conversion in a single unit. These specialized enclosures accept line voltage input and provide regulated low voltage output suitable for LED strips, eliminating the need for separate driver mounting and reducing overall installation complexity.
ETL-listed LED junction boxes provide code-compliant solutions for hardwired installations, certified to pass building inspections while offering features like dimmer compatibility, overcurrent protection, and thermal management. High-capacity models can support extended LED strip runs—some rated for over 300 feet of strip lighting—making them ideal for large commercial installations, architectural cove lighting, or exterior building illumination. citation
These integrated solutions also address common installation challenges like dimmer-induced flickering or incomplete shut-off, incorporating electronic components that ensure smooth dimming performance and complete darkness when switched off. For professional installations where reliability and code compliance are non-negotiable, specialized LED junction boxes represent the optimal solution despite their higher initial cost.
Weatherproof and IP-Rated Enclosures
Outdoor LED strip installations demand junction boxes with appropriate Ingress Protection (IP) ratings to prevent moisture and dust intrusion. IP ratings use a two-digit system: the first digit indicates solid particle protection (0-6), while the second indicates liquid ingress protection (0-9). For outdoor LED applications, minimum ratings of IP65 (dust-tight, protected against water jets) ensure reliable performance in exposed locations.
IP65-rated junction boxes feature gasket-sealed covers, waterproof cable entry systems, and corrosion-resistant materials that withstand rain, snow, and humidity without degradation. More demanding environments—such as pool lighting, fountain installations, or marine applications—require IP67 or IP68 ratings, providing protection against temporary submersion or continuous underwater operation.
Weatherproof junction boxes must also accommodate thermal expansion and contraction as outdoor temperatures fluctuate. Quality enclosures incorporate breather vents with moisture barriers that equalize internal pressure while preventing water ingress, avoiding the condensation buildup that can corrode connections and cause failures over time. citation
Junction Box Types Comparison
| Junction Box Type | Material | Typical IP Rating | Voltage Capacity | Best Applications | Advantages | Limitations |
|---|---|---|---|---|---|---|
| Standard Metal Box | Steel/Aluminum | IP20-IP54 | Up to 600V | Commercial, industrial, indoor installations | Excellent durability; automatic grounding; EMI shielding | Heavier; requires proper grounding; corrosion risk in damp locations |
| Standard Plastic Box | PVC/ABS | IP20-IP65 | Up to 600V | Residential, damp locations, outdoor (when rated) | Corrosion-resistant; electrical isolation; lightweight | Less mechanical protection; UV degradation (unless rated); lower heat tolerance |
| Integrated LED Driver Box | Plastic/Metal | IP20-IP65 | Input: 120-240V AC; Output: 12-24V DC | Hardwired LED installations, commercial lighting, long strip runs | Code-compliant; combines power conversion and protection; dimmer-compatible | Higher cost; limited to specific voltage outputs; requires proper heat dissipation |
| Compact LED Junction Box | Plastic | IP20 | Up to 120V | Kitchen under-cabinet, cove lighting, short runs (<60ft) | Space-efficient; easy installation; ETL-listed | Limited capacity; indoor use only; not suitable for long runs |
| Weatherproof Enclosure | Polycarbonate/Fiberglass | IP65-IP68 | Up to 600V | Outdoor architectural, landscape, marine, pool lighting | Superior moisture protection; UV-resistant; thermal management | Higher cost; larger size; requires proper cable gland installation |
Wire Management and Heat Shrink Protection
Proper wire management within junction boxes directly impacts installation reliability, maintenance accessibility, and long-term performance. Organized wiring prevents accidental disconnections, simplifies troubleshooting, and ensures adequate spacing for heat dissipation—critical factors in LED installations where multiple circuits may converge in a single enclosure.
Cable Entry and Strain Relief
Junction boxes feature knockout holes or cable entry points where wires enter the enclosure. Proper cable entry requires appropriate connectors or grommets that secure the cable, prevent sharp edges from damaging insulation, and maintain the box’s environmental rating. For metal boxes, cable clamps or conduit connectors provide mechanical support and ensure proper grounding continuity. Plastic boxes use snap-in cable clamps or threaded cable glands that compress around the cable jacket, creating both strain relief and environmental sealing.
Strain relief prevents mechanical stress from transferring to electrical connections inside the box. LED strip installations often experience cable movement from thermal expansion, vibration, or accidental pulling during maintenance. Without proper strain relief, these forces can loosen wire connections, creating high-resistance joints that generate heat and potentially cause failures. Quality cable entry systems grip the cable jacket firmly without crushing conductors, distributing mechanical stress across a larger area and protecting the critical connection points inside the box.
For outdoor installations, cable glands with compression seals provide IP-rated protection, maintaining the enclosure’s weatherproof integrity even when multiple cables enter the box. These glands feature rubber or silicone seals that compress around the cable as the gland is tightened, creating a waterproof barrier that prevents moisture migration along the cable into the junction box interior.
Heat Shrink Tubing for Connection Protection
While junction boxes provide external protection for wire connections, heat shrink tubing offers critical protection at the individual connection level. When LED strip wires connect to power feeds or when multiple strips join together, these connection points represent potential failure locations where moisture, oxidation, or mechanical stress can cause problems. Heat shrink tubing creates a protective barrier that insulates, waterproofs, and mechanically reinforces these vulnerable junctions.
Adhesive-lined heat shrink tubing provides the highest level of protection for LED strip connections. The dual-wall construction features an outer polyolefin layer for mechanical protection and an inner thermoplastic adhesive that melts during heating to create a hermetic seal. As the tubing shrinks (typically 3:1 ratio), the adhesive flows into every gap, completely encapsulating the connection and creating a moisture barrier that prevents corrosion and maintains low electrical resistance over time. citation
For LED strip lighting applications, clear heat shrink tubing offers the advantage of visual inspection—technicians can verify proper connection quality without removing the protection. This transparency proves particularly valuable during installation verification and future troubleshooting. The heat shrink should extend beyond the connection point to cover at least 10-15mm of insulated wire on each side, ensuring complete protection of the exposed conductor area. citation
Marine-grade heat shrink with adhesive lining provides maximum protection for outdoor LED installations exposed to regular moisture. This specialized tubing creates waterproof seals capable of withstanding direct water exposure, making it essential for landscape lighting, architectural installations, or any application where connections may encounter rain, snow, or high humidity. The investment in quality heat shrink protection prevents the costly failures and maintenance calls that result from corroded connections in outdoor LED systems. citation
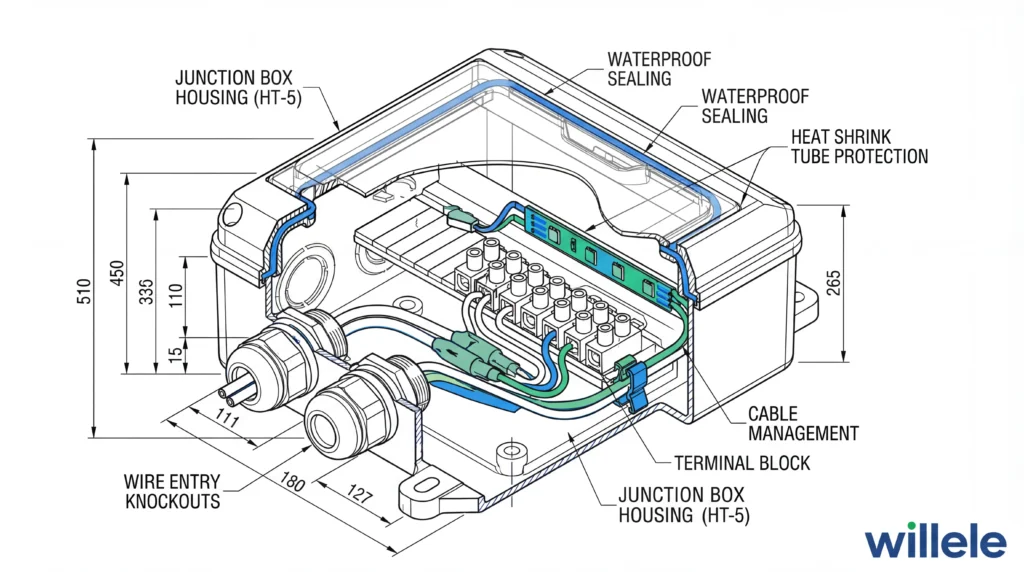
Technical cross-section showing proper junction box installation with heat shrink protected connections and organized wire routing
Installation Best Practices for LED Strip Junction Boxes
Professional LED strip lighting installations require attention to detail at every step, from initial planning through final testing. Following established best practices ensures code compliance, optimal performance, and long-term reliability.
Planning and Sizing
Begin every LED strip project by calculating total power requirements and voltage drop characteristics. LED strips specify power consumption per foot or meter—multiply this by the total strip length to determine total wattage. Add 20% safety margin to account for power supply aging and ensure operation below maximum rated capacity. This total wattage determines the required power supply capacity and influences junction box sizing for adequate wire and component accommodation.
Voltage drop calculations determine optimal junction box placement and power distribution strategy. LED strips operating on 12V systems experience more significant voltage drop than 24V systems due to higher current draw for equivalent wattage. Calculate voltage drop using the formula: VD = (2 × L × R × I) / 1000, where L is cable length in feet, R is wire resistance per 1000 feet (based on wire gauge), and I is current in amperes. Voltage drop should not exceed 5% for optimal LED performance—if calculations show excessive drop, either increase wire gauge, reduce run length, or implement parallel power distribution through strategically placed junction boxes.
Junction box placement should consider both electrical requirements and practical access needs. Position boxes at convenient locations for power supply connections, control integration, and future maintenance access. Avoid locations where the box will be difficult to reach after construction completion or where it creates aesthetic concerns. For ceiling-mounted installations, coordinate junction box locations with structural members to ensure secure mounting and avoid conflicts with HVAC, plumbing, or other building systems.
Wiring and Connection Techniques
Strip wire insulation to the minimum length necessary for secure connections—typically 10-12mm for most terminal blocks or wire connectors. Excessive exposed conductor creates short circuit risk, while insufficient stripping prevents proper connection engagement. Use quality wire strippers sized for the conductor gauge to avoid nicking or cutting individual strands, which reduces effective cross-sectional area and creates weak points susceptible to breakage.
For solid-core wire connections, ensure the conductor is straight and fully inserted into terminal blocks or wire nuts. Stranded wire should be twisted together to consolidate strands before insertion, preventing stray strands that could cause short circuits. Some installers prefer tinning stranded wire ends with solder to create a solid termination, though this practice requires care to avoid creating a stress concentration point where the rigid tinned section meets flexible wire.
Wire connections inside junction boxes must be mechanically and electrically sound. Twist-on wire connectors (wire nuts) require proper sizing for the wire gauge and number of conductors being joined. The wires should twist together before applying the connector, not rely on the connector alone to create the twist. Tighten the connector until resistance is felt, then give an additional quarter turn—overtightening can damage the connector or wires. After connection, gently pull each wire to verify secure engagement.
Terminal blocks offer superior organization for complex LED strip installations involving multiple circuits. These screw-terminal devices provide clear, labeled connection points that simplify installation and future modifications. Torque screws to manufacturer specifications—undertightening allows wires to pull out, while overtightening can crush conductors or crack the terminal block body. Use ferrules on stranded wire ends when connecting to screw terminals to prevent strand breakage and ensure maximum contact area.
Heat Shrink Application
Apply heat shrink tubing before making the final connection—sliding tubing onto one wire before joining allows positioning over the completed connection. Select tubing with appropriate shrink ratio (3:1 recommended) and diameter to fit over the connection while shrinking tightly around the wire insulation. Position the tubing to center over the connection with equal overlap on both sides.
Apply heat evenly using a heat gun, starting from the center and working toward the ends. This technique prevents air pockets from becoming trapped under the shrinking tubing. For adhesive-lined tubing, continue heating until adhesive begins to flow from the tubing ends—this visible oozing confirms complete activation and proper sealing. Avoid overheating, which can char the tubing or damage wire insulation. Allow the connection to cool completely before handling or subjecting to mechanical stress.
For multiple connections in close proximity, apply heat shrink to each connection individually before moving to the next. Attempting to heat multiple connections simultaneously risks overheating some while underheating others, resulting in incomplete sealing and inadequate protection.
Installation Process Checklist
| Step | Action | Quality Check | Common Errors to Avoid |
|---|---|---|---|
| 1. Power Calculation | Calculate total LED strip wattage + 20% safety margin | Verify power supply capacity exceeds total load | Undersizing power supply; ignoring safety margin |
| 2. Voltage Drop Analysis | Calculate voltage drop for planned wire runs | Ensure voltage drop <5%; adjust wire gauge or run length if needed | Using undersized wire; excessive run lengths |
| 3. Junction Box Selection | Choose box type based on environment and capacity needs | Verify IP rating for location; confirm adequate internal volume | Undersized box; wrong IP rating for environment |
| 4. Box Mounting | Securely mount box to structural support | Level installation; secure mounting; proper orientation | Mounting to weak surfaces; poor accessibility |
| 5. Cable Entry | Install cable clamps or glands at all entry points | Proper strain relief; maintained IP rating; no sharp edges | Missing strain relief; damaged cable insulation |
| 6. Wire Preparation | Strip insulation to correct length (10-12mm) | Clean cuts; no nicked strands; proper strip length | Excessive exposed conductor; damaged strands |
| 7. Heat Shrink Pre-positioning | Slide heat shrink onto wires before connecting | Correct size and position; adequate length for overlap | Forgetting to install before connection; wrong size |
| 8. Wire Connection | Join wires using appropriate connectors or terminals | Mechanically secure; proper torque; no exposed conductor | Loose connections; overtightening; stray strands |
| 9. Heat Shrink Application | Apply even heat until adhesive flows at ends | Complete shrinkage; adhesive visible; no air pockets | Overheating; incomplete activation; trapped air |
| 10. Organization | Route and secure wires neatly inside box | Adequate spacing; no pinched wires; clear access to connections | Wire congestion; pinched conductors; poor routing |
| 11. Cover Installation | Install junction box cover with proper seal | Gasket properly seated; secure fasteners; maintained IP rating | Missing gasket; loose cover; compromised seal |
| 12. Testing | Test all LED strips for proper operation and brightness | Uniform brightness; no flickering; proper color; all zones functional | Skipping testing; accepting marginal performance |
Code Compliance and Safety Considerations
LED strip lighting installations must comply with applicable electrical codes to ensure safety and pass inspection. The National Electrical Code (NEC) in the United States, Canadian Electrical Code (CEC), and similar standards worldwide establish requirements for junction box installation, wire sizing, and circuit protection.
Junction Box Requirements
Electrical code mandates that all wire splices and connections occur within approved enclosures—junction boxes fulfill this requirement by containing connections and preventing accidental contact with live conductors. The box must be accessible without removing permanent building finishes; concealing a junction box behind drywall or within a sealed cavity violates code and creates serious safety hazards. citation
Junction boxes must be sized according to code-specified fill calculations that account for conductor volume, wire connector volume, and device volume. Overcrowded boxes create installation difficulties and fire hazards. As a general guideline, the box should appear no more than 75% full after all connections are complete, allowing adequate space for heat dissipation and future modifications.
All metal junction boxes require proper grounding, with a continuous ground path from the electrical panel through the box to all connected devices. Use green ground screws or grounding clips to bond the box to the equipment grounding conductor. Plastic boxes do not require grounding themselves but must still provide proper ground connections between incoming and outgoing ground conductors.
Circuit Protection
LED strip lighting circuits require appropriate overcurrent protection sized for the wire gauge and circuit capacity. Standard residential circuits use 15A or 20A breakers with corresponding 14 AWG or 12 AWG wire. LED strips draw relatively low current—a typical 5-meter strip at 12V may draw only 2-4 amperes—but the circuit protection must match the wire gauge, not the load. Never install wire smaller than the circuit breaker rating permits.
For low voltage LED systems, the power supply provides overcurrent protection for the DC side, but the AC input circuit still requires standard breaker protection. Some LED power supplies incorporate short circuit protection, thermal shutdown, and overcurrent limiting that protect both the power supply and connected LED strips from fault conditions.
Ground Fault Circuit Interrupter (GFCI) protection is required for outdoor LED installations and any indoor locations near water sources (kitchens, bathrooms, outdoor outlets). GFCI devices detect current imbalances between hot and neutral conductors, indicating current leakage that could cause electric shock, and interrupt the circuit within milliseconds. LED drivers and power supplies must be compatible with GFCI protection—some electronic devices can cause nuisance tripping if not properly designed.
Troubleshooting Common Junction Box Issues
Even properly installed LED strip systems can experience problems over time. Recognizing common failure modes enables effective diagnosis and repair.
Flickering or Dimming LEDs
Flickering typically indicates loose connections, inadequate power supply capacity, or dimmer incompatibility. Check all connections within junction boxes for tightness—loose terminal screws or poorly engaged wire nuts create intermittent contact that causes flickering. Verify power supply capacity exceeds total LED load by at least 20%—overloaded supplies cannot maintain stable voltage, causing brightness fluctuations.
Dimmer-induced flickering occurs when LED drivers are incompatible with the dimmer type. LED systems require dimmers specifically designed for LED loads—traditional incandescent dimmers often cause flickering, buzzing, or incomplete dimming with LED loads. Specialized LED junction boxes with integrated drivers address this issue through electronic components that ensure dimmer compatibility. citation
Uneven Brightness Across LED Strips
Brightness variations typically result from voltage drop in extended runs or improper parallel wiring. Measure voltage at the beginning and end of LED strip runs—if the voltage difference exceeds 5%, the run is too long for the wire gauge used. Solutions include increasing wire gauge, reducing run length, or implementing parallel power distribution where multiple strips connect directly to the junction box rather than daisy-chaining.
Color temperature shifts in white LED strips indicate the same voltage drop issues—LEDs at the far end of long runs appear warmer (more yellow) than those near the power source. RGB strips show color imbalance, with red LEDs (which operate at lower voltage) remaining brighter than blue and green at the end of long runs.
Moisture-Related Failures
Corrosion or water damage in junction boxes indicates inadequate environmental protection. Inspect the box IP rating and verify it meets requirements for the installation location. Check all cable entry points for proper sealing—missing or damaged gaskets allow moisture intrusion even in IP-rated enclosures. Verify heat shrink protection on all connections inside the box provides complete coverage with no gaps or damage.
For outdoor installations, condensation can form inside junction boxes due to temperature cycling even when external sealing is intact. Quality weatherproof boxes incorporate breather vents that equalize pressure while blocking moisture. If condensation is present, improve ventilation or relocate the box to a more protected location.
Frequently Asked Questions
Q: Do I need a junction box for low voltage (12V/24V) LED strip lighting?
A: While low voltage systems are safer than line voltage, junction boxes are still highly recommended for organizing connections, preventing short circuits, and protecting wires from physical damage. Code requirements vary by jurisdiction—some require junction boxes for all permanent electrical connections regardless of voltage, while others exempt Class 2 low voltage circuits. Even when not strictly required, junction boxes provide professional organization and protect your investment in LED lighting systems.
Q: What size junction box do I need for my LED strip project?
A: Junction box sizing depends on the number and gauge of wires, plus any devices (terminal blocks, drivers) inside the box. As a practical guideline, choose a box that appears no more than 75% full after installation. For simple installations with 2-3 wire connections, a standard 4″ square box (21 cubic inches) usually suffices. Complex installations with multiple LED strip runs, dimmer controls, or integrated drivers may require 6″ or larger boxes. Consult NEC Article 314 for specific fill calculations based on your wire configuration.
Q: Can I use a standard electrical junction box for outdoor LED strip lighting?
A: Only if the box has an appropriate IP rating for outdoor use—minimum IP65 for exposed locations. Standard indoor junction boxes lack the gasket seals and weatherproof cable entries necessary for outdoor reliability. Invest in proper weatherproof enclosures with IP65 or higher ratings to prevent moisture intrusion, corrosion, and premature failures. The modest additional cost is insignificant compared to the expense and inconvenience of replacing failed outdoor installations.
Q: How do I prevent voltage drop in long LED strip runs?
A: Use junction boxes to implement parallel power distribution—run separate power feeds from the junction box to multiple LED strip segments rather than daisy-chaining strips end-to-end. Increase wire gauge to reduce resistance (e.g., use 14 AWG instead of 18 AWG for long runs). Choose 24V LED strips instead of 12V systems—the lower current draw at 24V significantly reduces voltage drop. For very long runs, consider multiple power supplies positioned along the installation rather than powering everything from a single source.
Q: What type of heat shrink should I use for LED strip connections?
A: Use adhesive-lined heat shrink tubing with 3:1 shrink ratio for optimal protection. The adhesive inner layer creates waterproof seals that prevent moisture intrusion and corrosion. Clear tubing allows visual inspection of connection quality. For outdoor installations or high-moisture environments, specify marine-grade heat shrink with enhanced adhesive formulations. Ensure the tubing diameter is large enough to fit over your connections before shrinking but small enough to grip the wire insulation tightly after heating.
Q: How often should I inspect junction boxes in LED strip installations?
A: For indoor residential installations, annual inspection during routine maintenance is typically sufficient. Check for loose connections, signs of overheating (discoloration, melted insulation), and verify all cover screws remain tight. Outdoor installations require more frequent inspection—every 6 months for exposed locations subject to weather extremes. Commercial installations should follow facility maintenance schedules, typically quarterly inspections for critical lighting systems. Always inspect after any water intrusion event, severe weather, or if LED performance changes (flickering, dimming, or failures).
Conclusion
Junction boxes represent far more than simple wire containment—they are the foundation of reliable, professional LED strip lighting installations. By providing organized connection points, environmental protection, and code-compliant wire management, properly selected and installed junction boxes ensure LED systems deliver years of trouble-free performance. The integration of heat shrink protection at individual connections creates multiple layers of defense against the moisture, vibration, and environmental challenges that threaten electrical reliability.
Success in LED strip lighting projects requires attention to detail at every phase: careful planning and power calculations, appropriate junction box selection for the environment and application, meticulous installation following best practices, and proper use of heat shrink protection to safeguard every connection. These investments in quality components and proper technique pay dividends through reduced maintenance, eliminated callbacks, and satisfied customers who enjoy beautiful, reliable LED lighting.
Willele Electric specializes in manufacturing premium heat shrink tubes and electrical protection solutions designed specifically for LED lighting applications. Our products provide the reliability and performance that professional installers demand, meeting international quality standards while offering the technical support necessary for successful project completion. For technical specifications, product selection guidance, or custom solutions for your LED strip lighting projects, visit willele.com or contact our engineering support team.
